×
- Live Chat
- 1-888-984-2011

My Garage
My Account
Cart
Genuine Honda CR-V Timing Cover
Engine Timing Cover- Select Vehicle by Model
- Select Vehicle by VIN
Select Vehicle by Model
orMake
Model
Year
Select Vehicle by VIN
For the most accurate results, select vehicle by your VIN (Vehicle Identification Number).
11 Timing Covers found
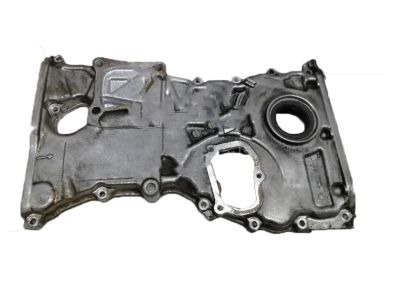
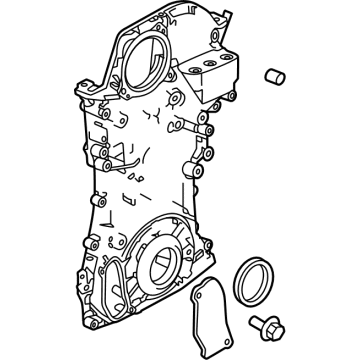
Honda CR-V Case Assembly, Chain
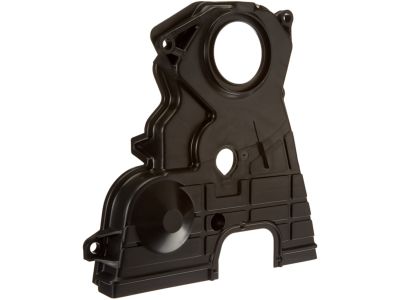
Part Number: 11410-59B-000$153.19 MSRP: $218.22You Save: $65.03 (30%)Honda CR-V Cover, Timing Belt (Lower)
Part Number: 11810-P72-A00$86.05 MSRP: $121.53You Save: $35.48 (30%)Honda CR-V Cover, Timing Belt Back
Part Number: 11840-PR4-A00$44.38 MSRP: $62.68You Save: $18.30 (30%)Honda CR-V Case Assembly, Chain
Part Number: 11410-5X6-J10$156.50 MSRP: $222.93You Save: $66.43 (30%)Honda CR-V Case Assembly, Chain
Part Number: 11410-PPA-000$189.46 MSRP: $269.88You Save: $80.42 (30%)Honda CR-V Cover, Timing Belt Middle
Part Number: 11820-PR4-A01$40.73 MSRP: $57.53You Save: $16.80 (30%)Honda CR-V Case Assembly, Chain
Part Number: 11410-REZ-A01$113.93 MSRP: $160.92You Save: $46.99 (30%)Honda CR-V Case Assembly, Chain
Part Number: 11410-5X6-J00$350.82 MSRP: $499.75You Save: $148.93 (30%)Honda CR-V Case Assembly, Chain
Part Number: 11410-RZA-A00$131.61 MSRP: $187.48You Save: $55.87 (30%)Honda CR-V Case Assembly, Chain
Part Number: 11410-RZA-010$182.04 MSRP: $259.32You Save: $77.28 (30%)
Honda CR-V Timing Cover
The Timing Cover of Honda CR-V vehicles plays an important role to protect the timing mechanism and this may contain timing belt or timing chain or cam belt. Made of some of the hard materials including aluminum, plastic, or steel, the Honda CR-V Timing Cover shields the timing components from the debris which may cause harm to the teeth of the engine. Usually these covers have gaskets incorporated on them which further aids in the prevention of deterioration of the timing belt. However, as observed in this article, even the prime Timing Covers such as the Honda CR-V Timing Covers can fail anytime and, therefore, require replacement to ensure that the car is safe for use. Over the years, various styles of Timing Covers have been employed in Honda CR-V models, but the primary function remains consistent: for later reliability and dependable durability of the engines timing system.
In search of affordable OEM Honda CR-V Timing Cover? Consider browsing through our extensive inventory of genuine Honda CR-V Timing Cover. Not only do we provide market-leading prices and a manufacturer's warranty, but we also pride ourselves on exceptional customer service and swift delivery.
Honda CR-V Timing Cover Parts Questions & Experts Answers
- Q: How do you remove and reinstall the components of the timing chain cover on 2.4L engine on Honda CR-V?A: To remove the components, first disconnect the cable from the negative battery terminal. Next, take out the VTC oil control solenoid valve from the timing cover. For Civic models, remove the cowl panel. Loosen the right front wheel lug nuts, raise the front of the vehicle, and securely support it on jackstands before removing the right front wheel. Remove the splash shields from below the engine compartment and drain the engine oil, then remove the drivebelt. Detach the drivebelt tensioner from the timing cover by removing the mounting bolts. Disconnect the crankshaft position sensor harness and any other electrical connectors that may obstruct the timing cover removal. Drain the cooling system, remove the oil cooler joint pipe mounting bolt from the water pump if equipped, pull the joint pipe back and out, and then remove the O-ring. Support the engine with a floor jack, placing a wood block between the jack head and the Oil Pan to prevent damage. Remove the ground cable and the right side engine mount and bracket assembly, followed by the valve cover. Remove the mounting bolts and the timing cover, along with the cover-to-block gasket. For installation, inspect and clean all sealing surfaces of the timing cover and the block, taking care not to gouge aluminum parts. If necessary, replace the Crankshaft Seal. Apply RTV sealant to the cylinder block mating surfaces on the cover, the upper surface contact areas, and the oil pan mating surfaces, as well as a small amount to the inner thread holes. Install a new timing cover O-ring, followed by the timing cover and fasteners, ensuring they are in their original locations and tightening them by hand until the cover contacts the block. Tighten the bolts to the specified torque, then install a new O-ring onto the oil cooler joint pipe and insert it into the water pump, tightening the bolt to the specified torque. Install the drivebelt tensioner, tightening the bolts to the specified torque, and then install the Crankshaft Pulley. Connect the wiring harness connectors and secure them with clamps. Reinstall the remaining parts in the reverse order of removal, fill the crankcase with the recommended oil, refill the cooling system, and reconnect the battery. Finally, start the engine and check for leaks, ensuring all fluid levels are correct.
Related Honda CR-V Parts
Browse by Year
2024 Timing Cover 2023 Timing Cover 2022 Timing Cover 2021 Timing Cover 2020 Timing Cover 2019 Timing Cover 2018 Timing Cover 2017 Timing Cover 2016 Timing Cover 2015 Timing Cover 2014 Timing Cover 2013 Timing Cover 2012 Timing Cover 2011 Timing Cover 2010 Timing Cover 2009 Timing Cover 2008 Timing Cover 2007 Timing Cover 2006 Timing Cover 2005 Timing Cover 2004 Timing Cover 2003 Timing Cover 2002 Timing Cover 2001 Timing Cover 2000 Timing Cover 1999 Timing Cover 1998 Timing Cover 1997 Timing Cover


