×
- Live Chat
- 1-888-984-2011

My Garage
My Account
Cart
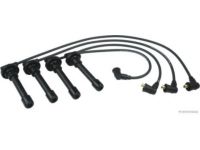
Genuine Honda Prelude Spark Plug Wire
Spark Plug Ignition Wires- Select Vehicle by Model
- Select Vehicle by VIN
Select Vehicle by Model
orMake
Model
Year
Select Vehicle by VIN
For the most accurate results, select vehicle by your VIN (Vehicle Identification Number).
76 Spark Plug Wires found
Honda Prelude Wire, Ignition Center
Part Number: 32723-PJ6-660$14.32 MSRP: $20.34You Save: $6.02 (30%)Honda Prelude Wire Assembly, Ignition
Part Number: 32722-PC6-660$31.15 MSRP: $44.37You Save: $13.22 (30%)Honda Prelude Wire, Ignition Center
Part Number: 32723-PB3-691$17.70 MSRP: $25.02You Save: $7.32 (30%)Honda Prelude Wire, Resistance (No.1)
Part Number: 32701-P13-A00$18.75 MSRP: $26.48You Save: $7.73 (30%)Honda Prelude Wire, Ignition Center
Part Number: 32723-PC6-664$4.20 MSRP: $34.43You Save: $30.23 (88%)Honda Prelude Wire, Ignition Center
Part Number: 32723-PK1-660$16.83 MSRP: $23.77You Save: $6.94 (30%)Honda Prelude Wire, Ignition Center
Part Number: 32723-PK1-661$16.83 MSRP: $23.77You Save: $6.94 (30%)Honda Prelude Wire, Ignition Center
Part Number: 32723-PB3-660$17.70 MSRP: $25.02You Save: $7.32 (30%)Honda Prelude Wire, Resistance (No.2)
Part Number: 32702-P13-000$20.02 MSRP: $28.30You Save: $8.28 (30%)Honda Prelude Wire Assembly, Ignition
Part Number: 32700-PB3-660$38.02 MSRP: $53.71You Save: $15.69 (30%)Honda Prelude Wire, Ignition
Part Number: 32722-PK1-662$40.71 MSRP: $57.49Limited AvailabilityYou Save: $16.78 (30%)
| Page 1 of 4 |Next >
1-20 of 76 Results
Honda Prelude Spark Plug Wire
The Spark Plug Wire of Honda Prelude is responsible for initiating the ignition process and connection of electricity supplied from the ignition coil to the spark plugs for the firing of the vehicles' engine. Popularly called high tension leads or HT leads these cables use an electrical insulation material to withstand heat that may cause arcing. The spark plug wires of today have many features that may minimize interference such as resistive conductors as well as inductor coils. Some high-quality spark plug wires also have brass terminals as this is corrosion free. Although previous generations of engines might come with a coil wire, current engines use coil packs/individual ignition coils, which replace the spark plug wire. Because of this, the maintenance and placement of these wires are critical in the efficiency and durability of the engines.
In search of affordable OEM Honda Prelude Spark Plug Wire? Consider browsing through our extensive inventory of genuine Honda Prelude Spark Plug Wire. Not only do we provide market-leading prices and a manufacturer's warranty, but we also pride ourselves on exceptional customer service and swift delivery.
Honda Prelude Spark Plug Wire Parts Questions & Experts Answers
- Q: How to inspect and replace spark plug wires for the Honda Prelude?A: During every tune-up/inspection, visually check the Spark Plug cables for fluid contamination burns chaffing, cuts, or breaks in the insulation. Check the boots and the nipples on the ignition coil or distributor, if equipped. Replace any damaged wiring. Every 60,000 miles (96,000 km) or 48 months, the resistance of the wires should be checked with an ohmmeter. Wires with excessive resistance will cause misfiring, and may cause the engine to be difficult to start in damp weather. Ignition wire resistance should not be greater than 25 kilometers. To check resistance, remove the spark plug wire from the plug and ignition coil or distributor. Using an ohmmeter, measure the resistance of the wire by placing one lead of the ohmmeter at one end at the ignition wire, and the other ohmmeter lead at the other end of the ignition wire. If the measured resistance is above the specifications, the ignition wire must be replaced. Remove the spark plug wire by first twisting it and then pulling up on the boot, not the wire itself, to remove it. The spark plug wires must be routed and connected properly. If the wires must be completely disconnected from the spark plugs and from the Distributor Cap or ignition coil at the same lime, label the wires to assure proper reconnection. When installing a new set of spark plug wires, replace the wires one at a time to avoid mixing them up. Start by replacing the longest cable first. Twist the boot of the spark plug wire 1/2 turn in each direction before pulling it off. Install the boot firmly over the spark plug. Route the wire exactly the same as the original. Insert the nipple firmly onto the tower of the distributor cap, if equipped. Use a silicone dielectric compound on the spark plug wire boots and distributor cap connectors prior to installation.
Related Honda Prelude Parts
Browse by Year
2001 Spark Plug Wire 2000 Spark Plug Wire 1999 Spark Plug Wire 1998 Spark Plug Wire 1997 Spark Plug Wire 1996 Spark Plug Wire 1995 Spark Plug Wire 1994 Spark Plug Wire 1993 Spark Plug Wire 1992 Spark Plug Wire 1991 Spark Plug Wire 1990 Spark Plug Wire 1989 Spark Plug Wire 1988 Spark Plug Wire 1987 Spark Plug Wire 1986 Spark Plug Wire 1985 Spark Plug Wire 1984 Spark Plug Wire 1983 Spark Plug Wire 1982 Spark Plug Wire 1981 Spark Plug Wire 1980 Spark Plug Wire 1979 Spark Plug Wire


