- Live Chat
- 1-888-984-2011

Why choose HondaPartsNow
- Unbeatable Prices
HondaPartsNow.com is your prime online source for discounted prices. We offer high-quality options for your vehicle that can't be found anywhere else. HondaPartsNow.com offers genuine parts at discounted prices, allowing you to keep your vehicle running at its peak without straining your budget.
- Dedicated Service
HondaPartsNow.com ranks second to none in devoted customer service. We strive to exceed the customer's expectations and build relationships with the customers. We are always ready to assist you with any inquiry or detail about your vehicle's parts and accessories.
- Rapid Delivery
HondaPartsNow.com is devoted to combining genuine Honda Prelude parts and accessories with fast and affordable shipping. Most items listed in our catalog are in stock and are shipped out promptly after the order has been successfully processed. This guarantees you receive the parts your vehicle needs without needing to leave your home in just a matter of days.
Popular Genuine Honda Prelude Parts
- Electrical / Exhaust / Heater / Fuel Parts View More >
- Chassis Parts View More >
- Engine Parts View More >
- Interior / Bumper Parts View More >
- Body / Air Conditioning Parts View More >
- Accessories View More >
Shop Genuine Honda Prelude Parts with HondaPartsNow.com
The Honda Prelude is a sports car derived from the Honda Accord and developed in five generations. The first generation started on 24 November 1978, featuring four-wheel independent struts, brakes, as well an engine, which were all adopted from the first-generation Accord and offered a moon roof as standard. The second generation was released, equipped with an A18A or ET-2, 1.8 L 12-valve twin carburetor engine, producing the power of 105 PS (77 kW), and later altered to a 2-liter DOHC 16-valve PGM-FI engine. The third generation included a 0.34 drag coefficient, roof pillars made of high-strength metal, and the world's first mechanical four-wheel steering system. The fourth generation had a weight distribution is 58% front and 42% rear with an electronic version four-wheel steering system. The engine boosts from 2.1L to 2.2L, along with a 4-speed automatic or 5-speed manual transmission. For appearance, the traditional pop-up headlights were banned, and the front fascia became wider with fixed headlights. The fifth generation contained an FF layout and a 63% front and 37% rear weight distribution. The body style was a return to the third generation and was refreshed in 1999, including the power raise and an additional front grille.
Despite its unique delicacy as a 2-door sports coupe, the Honda Prelude can develop common problems over time. The primary issue is premature engine failure, characterized by a burning oil smell, oil loss through the exhaust, knocking engine sounds, retarded ignition timing, and reduced engine performance. A lit Check Engine Light could suggest problems with the oil pump, crankshaft pulley, valve cover gasket, timing cover, oil filter, or timing belt. Suspension and transmission issues also plague Prelude owners, often causing excessive vibration, poor handling, clunking sounds when shifting from drive to reverse, and severe tire and brake damage. These issues might be due to a worn radius arm bushing, coil spring insulator, or control arm bushing. The shift cable in the transmission system deserves special attention as well. Other key components include the window regulator, which can wear down and need more presses to operate the windows or produce clicking sounds. Regular maintenance of this component can prevent issues like a power window that won't stay up or becomes crooked. The wiper blade, seat belt, and fog lights also require regular attention to ensure safe and comfortable driving.
Every OEM part is meticulously built to precisely match the original part's specs. They also adhere to strict official quality control standards during manufacture to guarantee exceptional quality. Our website provides genuine Honda Prelude parts, including Transmission - Automatic, Transmission - Manual at unmatched prices. Each of our OEM Honda Prelude parts comes with a manufacturer's warranty, ensuring quality and peace of mind. Plus, we offer speedy delivery to get your vehicle back in prime condition in no time.
Honda Prelude Parts Questions & Answers
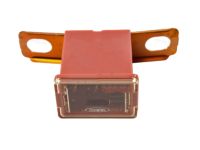
- Q: How are fuses, maxi-fuses, circuit breakers,Turn Signal Flasher and fusible links identified and replaced in a Honda Prelude's electrical system?A: Fuses and maxi-fuses are located in the engine and passenger compartments. Circuit breakers are inside the fuse panel. Fusible links are identified by color coding. To replace a turn signal flasher/hazard warning relay, pull the flasher from the connector, inspect the socket, install a new flasher, and replace the fuse panel cover.
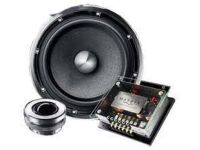
- Q: How to remove and install a Radio Receiver, Amplifier, Tape Player, and CD Player and Speakers on Honda Prelude?A: Note the radio security code, then disconnect the negative battery cable.Remove the center console.Detach the cup holder (if applicable).Remove the mounting bolts/screws from the console.Remove the mounting screws from the radio and then pull the unit out slightly for access to the connectors on the rear of the radio.Detach the connectors and antenna lead, then remove the radio from the vehicle.Installation is the reverse of the removal procedure. Once installed, enter the security code.SpeakersREMOVAL & INSTALLATION: If necessary, remove the door panel.Locate the small rectangular opening at the bottom of the speaker grilles.Using a suitable, small flat blade pry tool, carefully pry the speaker grille up.Remove the Phillips screws that mount the speaker.Carefully remove the speaker from the door panel, instrument panel or rear deck to gain access to the electrical connector.Remove the wire connector from the speaker, then remove the speaker from the vehicle.Installation is the reverse of the removal procedure.
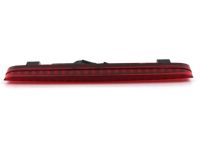
- Q: How to remove and install Headlights,Brake Light,Dome Light,Fog Light and Marker Lights on Honda Prelude?A: Locate the headlight bulb to be replaced. Turn the headlights off and detach the two-prong connector from the base of the bulb. Twist the bulb counterclockwise to unlock it, then carefully withdraw. Install a new bulb, attach the connector, and turn the switch on to check. For aiming, park the vehicle on a level surface facing a wall. Turn the headlights on and mark the center of each light's low and high beam. Perform any necessary repairs, then adjust the beams to match the marks. For signal and marker lights, remove the screw from the lens, detach the connector, and press in slightly to remove the bulb. Install a new bulb and check it with the switch.


