×
- Live Chat
- 1-888-984-2011

My Garage
My Account
Cart
Genuine Honda Prelude Ignition Control Module
Ignition Spark Control Module- Select Vehicle by Model
- Select Vehicle by VIN
Select Vehicle by Model
orMake
Model
Year
Select Vehicle by VIN
For the most accurate results, select vehicle by your VIN (Vehicle Identification Number).
11 Ignition Control Modules found
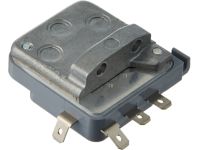
Honda Prelude Igniter Unit Kit (Nec/Elesys)
Part Number: 06302-PT2-000$177.34 MSRP: $252.62You Save: $75.28 (30%)Honda Prelude Igniter Unit (Oki)
Part Number: 30550-692-004$152.97 MSRP: $217.95You Save: $64.98 (30%)
Honda Prelude Ignition Control Module
In search of affordable OEM Honda Prelude Ignition Control Module? Consider browsing through our extensive inventory of genuine Honda Prelude Ignition Control Module. Not only do we provide market-leading prices and a manufacturer's warranty, but we also pride ourselves on exceptional customer service and swift delivery.
Honda Prelude Ignition Control Module Parts Questions & Experts Answers
- Q: Where is the Ignition Control Module (ICM) located, and How to test and remove it on Honda Prelude?A: The Ignition Control Module in the Accord and Prelude is tucked inside the distributor housing near the Ignition Coil, so to get to it you must pull the distributor cap back, remove the rotor, and if there is any, the dust cover. Position of the ignition wires on the distributor cap should also be identified by paper or by using other materials for identification to avoid misidentification or wrong replacement that might lead to replacement of the distributor cap and the consequent expensive charge. To test the Ignition Control Module on 2.2L and 2.3L engines start by disconnecting the distributor cap and a few wires from it and then check for battery voltage between the black/yellow and ground, then between green and ground wires. Continuity tests must be made between the yellow/green wire, the multi-connector and the Ignition Control Module with no continuity to ground. For the 2.7L engine, depending on the location, the harness connector might only consist of the yellow and green wires and the cap with wires on it; look for battery voltage on these wires and, similar to the previous engines, do continuity tests on other connections specified by the manufacturer. In the 3.0L engine, remove the distributor cap and then the 3 prong connector and verify voltage on No 2 & 3 terminals then check the continuity of Ignition Control Module and PCM leads. The Ignition Control Module can be removed by loosening the negative battery cable, then the distributor cap and rotor, and then pulling wires out of the Ignition Control Module before doing the reverse for installation. Lastly, if the battery is ever disconnected the PCM idle memory will have to be reset to normal by starting the engine and bringing it up to 3000 rpm for fan activation, allowing the engine to idle for five minutes without accessories and in Park or Neutral.
Related Honda Prelude Parts
Browse by Year
2001 Ignition Control Module 2000 Ignition Control Module 1999 Ignition Control Module 1998 Ignition Control Module 1997 Ignition Control Module 1996 Ignition Control Module 1995 Ignition Control Module 1994 Ignition Control Module 1993 Ignition Control Module 1992 Ignition Control Module 1991 Ignition Control Module 1990 Ignition Control Module 1989 Ignition Control Module 1988 Ignition Control Module 1987 Ignition Control Module 1986 Ignition Control Module 1985 Ignition Control Module 1984 Ignition Control Module 1983 Ignition Control Module 1982 Ignition Control Module 1981 Ignition Control Module 1980 Ignition Control Module 1979 Ignition Control Module


