×
- Hello
- Login or Register
- Quick Links
- Live Chat
- Track Order
- Parts Availability
- RMA
- Help Center
- Contact Us
- Shop for
- Honda Parts
- Honda Accessories

My Garage
My Account
Cart
Genuine Honda Crosstour Crankshaft
Crank Shaft- Select Vehicle by Model
- Select Vehicle by VIN
Select Vehicle by Model
orMake
Model
Year
Select Vehicle by VIN
For the most accurate results, select vehicle by your VIN (Vehicle Identification Number).
3 Crankshafts found


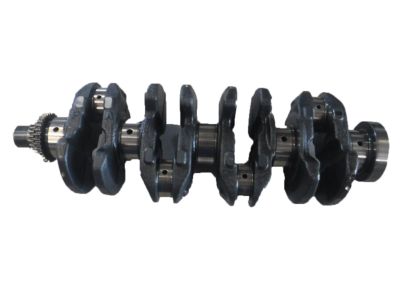
Honda Crosstour Crankshaft Complete
Part Number: 13310-5G0-A00$1186.82 MSRP: $1580.85You Save: $394.03 (25%)
Honda Crosstour Crankshaft
In search of affordable OEM Honda Crosstour Crankshaft? Consider browsing through our extensive inventory of genuine Honda Crosstour Crankshaft. Not only do we provide market-leading prices and a manufacturer's warranty, but we also pride ourselves on exceptional customer service and swift delivery.
Honda Crosstour Crankshaft Parts Questions & Experts Answers
- Q: How can the crankshaft be removed and installed on Honda Crosstour?A:If again, we take off the flywheel, crankshaft pulley, timing belt or chain, oilpan, oil pump body, oil filter and piston/conrod assemblies then the crankshaft can only be removed when the whole engine has been piped out from the car. In V6 engines, the rear main oil seal retainer is to be removed from the block before the crankshaft can be removed. First, to check the crankshaft endfloat, fix a dial indicator on the flange of the crank and take its Zero reading. Turn the crankshaft to the right and set the indicator on 0, after that turn the crankshaft to the left and read the figures which should be around 0.003 to 0.010 inch. If a dial indicator is not available then clearance can also be measured with the use of feeler gauges. Turn and untighten the main bearing assembly bolts slowly until you can by hand remove the main bearing assembly or caps, but you have to be very careful not to drop the bearing inserts. Remove the crankshaft from the engine and it might be a bit hard due to its large size and probably weight. As for fastening, make certain the engine block and crankshaft are free from debris and were checked for their conditions. Place the engine block in an upside-down fashion, and if there are any inserts in the bearings, they should then be withdrawn, and the bearing areas should be cleaned. New upper main bearing inserts should be put in the engine block, and parallel to the oil holes; the thrust washer must be fitted properly. Clean the lower main bearing inserts and fit them into main bearing assembly's or caps, and should not tap to fit. Once you have gotten to clean the crankshaft, you need to place it in its proper place, to measure the main bearing oil clearance you need to use Plastigage. The lower crankcase or caps should be installed, but do not rotate them in order to not compress the Plastigage; however, tighten the bolts in the specified order. Delete the bolts and measure the Plastigage to ascertain the oil clearance; no dirt or oil must have affected the reading. If clearance is incorrect than measure the bearing insert sizes and observe the crank journal for any taper. Erase any Plastigage deposit on the journals and insert faces. For final positioning increase and remove it, then grease or apply assembly lube in the bearing areas and make certain that the crankshaft journals are clean before replacing the crankshaft. Lubricate the bearing insert faces and fit the lower main bearing bridge, using a torque wrench to restore all the bolts. Check the crankshaft end play once again and manipulate the crank shaft to and fro and make sure it glides freely, if not correct it. Last, fit in the new rear main oil seal into place.


