×
- Hello
- Login or Register
- Quick Links
- Live Chat
- Track Order
- Parts Availability
- RMA
- Help Center
- Contact Us
- Shop for
- Honda Parts
- Honda Accessories

My Garage
My Account
Cart
Genuine Honda Crosstour Oil Pan
Oil Drain Pan- Select Vehicle by Model
- Select Vehicle by VIN
Select Vehicle by Model
orMake
Model
Year
Select Vehicle by VIN
For the most accurate results, select vehicle by your VIN (Vehicle Identification Number).
3 Oil Pans found
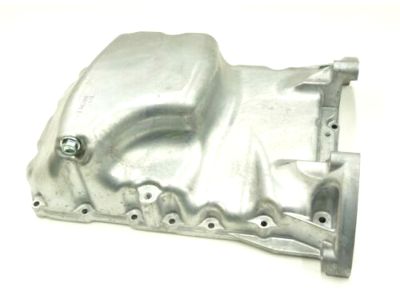
Honda Crosstour Pan Assembly, Oil
Part Number: 11200-R40-A00$232.17 MSRP: $330.73You Save: $98.56 (30%)Honda Crosstour Pan Complete, Oil
Part Number: 11200-5MH-A00$195.96 MSRP: $279.15You Save: $83.19 (30%)
Honda Crosstour Oil Pan
The Oil Pan is located in Honda Crosstour brand cars and is designed to hold the engine oil which subsequently is responsible for cooling and lubricating different components of the engine. Using wet sump system, Honda Crosstour Oil Pan gathers oil that passes through the pickup tube draw by the oil pump and spreads it within the engine. This design enables the oil to be sumped back to the Oil Pan after it has been used to lubricate the reciprocating masses of the engine. Traditionally, the Honda Crosstour Oil Pans were produced from stamped steel but with the process of development and improvement, manyOil Pans of different models are now constructed with cast aluminum to provide long-lasting endurance and optimal performance. The placing of the Oil Pan allows visibility of the position of the engine and keeps oil in optimum level while driving to enhance the efficiency of the engine.
In search of affordable OEM Honda Crosstour Oil Pan? Consider browsing through our extensive inventory of genuine Honda Crosstour Oil Pan. Not only do we provide market-leading prices and a manufacturer's warranty, but we also pride ourselves on exceptional customer service and swift delivery.
Honda Crosstour Oil Pan Parts Questions & Experts Answers
- Q: How to remove and install oil pan on Four cylinder engine on Honda Crosstour?A: To have the components out of the way, one has to unplug the cable from the negative terminal and take out the air filter housing. For manual transaxles remove the following: clutch release cylinder and hydraulic line bracket mounting bolts. Thirdly, unscrew the battery and battery tray and unclasp the harness connector clamp to have the harness out of the way. See if the front wheel lug nuts are loose, if not then you chivalously lift the vehicle using the jackstands and then remove the front wheels. Sucker out the engine oil and unbolt the ground cable and the upper transaxle mount bracket from the transaxle and engine room. Next, go and take out the front engine mount stop and the upper mount bolt and then take out the rear engine mount stop and the rear mount bolt. Remove the bolts connecting the stabilizer bar links to the lower control arm, remove the damper fork from the left shock absorber assembly and disconnect the left lower control arm from the steering knuckle. Disconnect the left driveaxle and four grommetted nuts of the transaxle container lower mount. Place a floor jack under the transaxle with a block of wood placed under the jack to avoid scratching the transaxle surface, then raise the transaxle to about two inches and then detach the transaxle brace. Subsequently the oil pan bolts should be unbolted and the oil pan should be gently eased off the engine block if needed this can be done with a rubber mallet and a block of wood and a hammer. For installation, scrap off all remnants of the previous gasket from the region round the lower crankcase and the oil pan by use of a scraper and solvent. Run a 2 mm thick line of RTV sealant on the outer rim of the oil pan, where it should dry for no more than 5 minutes. Reduce the heads of the oil pan bolts and fix them neatly in a star-like pattern with the central bolts tightened first. The remaining installation is a reversed procedure of removal, which guarantees that the transaxle brace and the driveaxle/hub nuts are tightened to the required torque. Last, do not start the engine for at least 3 hours after filling the crankcase and, when doing so, do not forget to change the oil filter and to fill the crankcase with the correct engine oil.


