×
- Live Chat
- 1-888-984-2011

My Garage
My Account
Cart
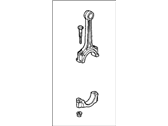
Genuine Honda CRX Connecting Rod
- Select Vehicle by Model
- Select Vehicle by VIN
Select Vehicle by Model
orMake
Model
Year
Select Vehicle by VIN
For the most accurate results, select vehicle by your VIN (Vehicle Identification Number).
6 Connecting Rods found
Honda CRX Connecting Rod
In search of affordable OEM Honda CRX Connecting Rod? Consider browsing through our extensive inventory of genuine Honda CRX Connecting Rod. Not only do we provide market-leading prices and a manufacturer's warranty, but we also pride ourselves on exceptional customer service and swift delivery.
Honda CRX Connecting Rod Parts Questions & Experts Answers
- Q: How do you remove and install the Connecting Rod and Pistons on Honda CRX?A: When draining coolant, be aware that ethylene glycol antifreeze can attract pets, posing a fatal risk if ingested, so always use a sealable container and reuse coolant unless contaminated or several years old. Minimize exposure to used engine oil, which can cause skin disorders, including cancer, by wearing protective gloves and washing hands promptly after contact. To begin removal with the engine out, disconnect the negative battery cable and remove the hood, then drain the Radiator and engine oil. Raise the vehicle and support it with safety stands, attaching a chain to the clutch cable bracket to relieve the center mount load without removing the left engine mount. Proceed to remove the center beam, engine lower mount, and Cylinder Head, then loosen and remove the Oil Pan and flywheel dust shield, tapping the corners lightly if necessary. Remove the oil passage block and Oil Pump assembly, then from underneath, take off the connecting rod bearing caps and push the pistons and connecting rods out, checking for carbon buildup or ridges before removal. When handling piston rings, avoid excessive force, and use a hydraulic press for piston pin removal. For installation, stagger the gaps of the three-piece oil ring and ensure markings on the second and top rings face upward, checking for smooth movement. Use a ring compressor to install the piston, applying oil to the rings and cylinder wall, and guide the connecting rod carefully during installation. Reassemble components in reverse order, ensuring proper alignment of bearing caps. For cleaning and inspection, remove rings with a piston ring expander, clean grooves carefully, and inspect for wear or damage, replacing pistons as necessary. Check the cylinder bore for wear using a telescope gauge and micrometer, measuring at specified points to determine clearance and whether oversized pistons are needed. When fitting new piston rings, compress them and measure the end gap, filing as necessary to avoid breakage, and inspect grooves for wear. Install rings in the correct order, ensuring proper positioning and spacing, and use a ring compressor for final assembly into the engine.


