×
- Live Chat
- 1-888-984-2011

My Garage
My Account
Cart
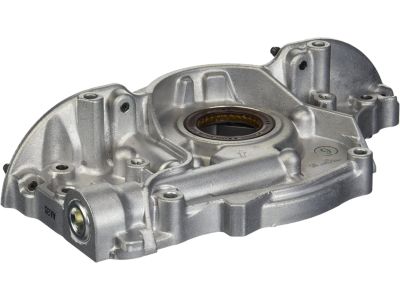
Genuine Honda CRX Oil Pump
Oil Fluid Pump- Select Vehicle by Model
- Select Vehicle by VIN
Select Vehicle by Model
orMake
Model
Year
Select Vehicle by VIN
For the most accurate results, select vehicle by your VIN (Vehicle Identification Number).
7 Oil Pumps found
Honda CRX Oil Pump
The Oil Pump in Honda CRX vehicles: The function of the Oil Pump is to circulate oil under pressure throughout the internal combustion engine. It acts as a coolant for bearings, pistons as well as ensuring that the camshaft gets lubricated and also offering hydraulic fluid for small actuators. The Honda CRX mostly employ mechanical oil pumps which are usually driven by the crankshaft or the camshaft as they are very reliable. There are diverse subcategories of oil pumps which may be used in different models of Honda CRX and these are the gear, trochoid, and the vane pumps. The oiling system is one that pulls oil from the sump, cools and filters it before distributing it all over the engine. Oil pressure must consistently be steady and is usually recommended to be approximately 10 psi for every 1000 rpm, high as well as low pressure can cause a lot of harm. Starting from Oil Pump of the Honda CRX, it is mandatory to maintain the automobile on a regular basis, which includes oil changing and replacement of the filters.
In search of affordable OEM Honda CRX Oil Pump? Consider browsing through our extensive inventory of genuine Honda CRX Oil Pump. Not only do we provide market-leading prices and a manufacturer's warranty, but we also pride ourselves on exceptional customer service and swift delivery.
Honda CRX Oil Pump Parts Questions & Experts Answers
- Q: How do you remove and install the oil pump on Honda CRX?A: If you are replacing the oil pump you will need to, disconnect the battery negative terminal, lift the vehicle, drain the oil, and remove the oil pump. Take No 1 cylinder to TDC with a timing mark on the crankshaft pulley being in line with the mark on the front cover. Take off the necessary accessory drive belts; the crankshaft pulley, and the valve cover, together with Timing Belt covers. Then, you have to remove Timing Belt Tensioner, timing belt and timing belt drive pulley, also remove Oil Pan and oil screen, and at last oil pump mount bolts and Oil pump assembly. For installation, simply, undo the following steps and make the sure the gasket mating surfaces are correctly clean. Before the installation of the oil pump, perform a check on the crankshaft oil seal and if it has developed a problem then should be replaced. Use liquid gasket on the cylinder block mating surface and also put thin coat of oil on the Crankshaft Seal lips. Insert new O-ring at the cylinder block and at the oil pump and apply liquid gasket at the thread of the oil mounting bolts and tighten to 9 ft. lbs. (12 Nm). Trim the screen and the subsequent oil pan back into position, make certain that the timing belt tension is okay and torque the crankshaft pulley bolt to the correct value. In overhaul of oil pump, the rotor radial clearance, both inner and outer rotors, should be set to 0.14 mm. Loosen the tone wheel lock nut and with feeler gauge identify how much body-to-rotor clearance there is new, and should be 0.10-0.18mm new, service limit 0.200mm. Measure the end play of the rotor between the rotor face and the gasket surface new specification, 0.025-0.100mm NS but with service limit of 0.152mm. If rotors are degraded and they require replacement, they must be replaced with the inner and outer rotors with their punch marks facing upwards. Apply petroleum jelly to the inside and outer surface of the pump cavity, screw in, and replace the assembly in the reverse of the steps above.


