×
- Hello
- Login or Register
- Quick Links
- Live Chat
- Track Order
- Parts Availability
- RMA
- Help Center
- Contact Us
- Shop for
- Honda Parts
- Honda Accessories

My Garage
My Account
Cart
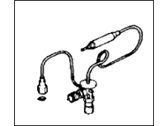
Genuine Honda CRX A/C Expansion Valve
Air Conditioning Expansion Valve- Select Vehicle by Model
- Select Vehicle by VIN
Select Vehicle by Model
orMake
Model
Year
Select Vehicle by VIN
For the most accurate results, select vehicle by your VIN (Vehicle Identification Number).
2 A/C Expansion Valves found
Honda CRX A/C Expansion Valve
This valve is known as the A/C Expansion Valve in Honda CRX cars and it has the responsibility of controlling the refrigerant in the air conditioning system in order to deliver the prime results. Therefore through controlling the flow the A/C Expansion Valve plays a crucial role in the efficiency and functioning of the A/C System. There has been the use of many variants of A/C Expansion Valves that have been used over the years in the many Honda CRX models as a result of their varied working requirements. Such valves may also be of a difference as regards their structure and operation, which will influence the degree of their ability to regulate refrigerant circulation. These differences are crucial to know in order to preserve A/C system on Honda CRX cars because only correct A/C Expansion Valve gives a comfortable ride.
In search of affordable OEM Honda CRX A/C Expansion Valve? Consider browsing through our extensive inventory of genuine Honda CRX A/C Expansion Valve. Not only do we provide market-leading prices and a manufacturer's warranty, but we also pride ourselves on exceptional customer service and swift delivery.
Honda CRX A/C Expansion Valve Parts Questions & Experts Answers
- Q: How do you remove and install the A/C Expansion Valve on Honda CRX?A:Before removing the Evaporator firstly you should disconnect negative terminal of the battery and then the management system of air conditioning should be depressurized. The next steps are to drain, disconnect and plug the refrigerant lines at the evaporator, and to remove the glove box, and support brackets. Lose the evaporator securing bands to release them, disconnect the air conditioner thermostat wire, unscrew the evaporator securing bolts and nuts. Remove the drain hose, then both the evaporator assembly and the evaporator case attaching clips and screws. Divide the case halves to get to the evaporator, then remove the expansion valve from it as well. To install the expansion valve, it is placed connecting between the expansion valve and the evaporator assembly and the evaporator assembly is then fitted into the case half and the assembly is made. Some of the works proposed include; Installing the evaporator assembly and reconnecting and the drain hose, and connecting the thermostat wire connector. Fit the vehicle with evaporator housing securing bands and the glove box assembly. Replace the refrigerant lines at the evaporator; be sure to tighten the suction hose to the evaporator to about 23 ft lbs. Its clamps consist of 32 Nm for the receiver pipe to the evaporator and 12 ft. lbs. (17 Nm). Last, connect the ground plate of battery and charge, evacuate and leak test the air conditioning equipment.


