×
- Live Chat
- 1-888-984-2011

My Garage
My Account
Cart
Genuine Honda CRX A/C Compressor
Air Conditioning Compressor- Select Vehicle by Model
- Select Vehicle by VIN
Select Vehicle by Model
orMake
Model
Year
Select Vehicle by VIN
For the most accurate results, select vehicle by your VIN (Vehicle Identification Number).
18 A/C Compressors found
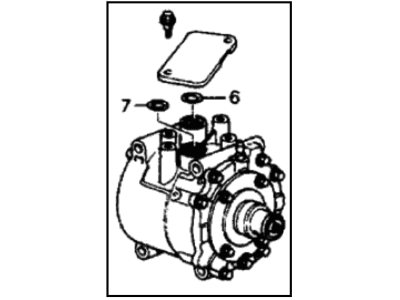
Honda CRX A/C Compressor
In search of affordable OEM Honda CRX A/C Compressor? Consider browsing through our extensive inventory of genuine Honda CRX A/C Compressor. Not only do we provide market-leading prices and a manufacturer's warranty, but we also pride ourselves on exceptional customer service and swift delivery.
Honda CRX A/C Compressor Parts Questions & Experts Answers
- Q: How do you remove and install the compressor on Honda CRX?A: To remove and install the compressor, first disconnect the negative battery cable and properly discharge the air conditioning system. Next, disconnect the magnetic clutch wire connector. If the vehicle has power steering, loosen the power steering pump adjusting bolt and remove the belt. Remove the power steering pump attaching bolts and take the pump out of its mount, setting it aside without disconnecting the hoses. Disconnect and plug the compressor refrigerant lines, then loosen the compressor attaching bolts along with the adjuster bolt and locknut. For 1984-87 models, it may be necessary to raise the vehicle and remove the lower splash shield to access the compressor bolts. Remove the compressor belt, then take out the compressor attaching bolts and the compressor itself, which can be laid on the front beam. Remove the compressor mounting bracket bolts and take the bracket and compressor out of the engine compartment. For installation, place the compressor and bracket back into the engine compartment, ensuring that if a new compressor is being installed, the proper amount of refrigerant oil is added, calculated by measuring the oil drained from the old compressor and deducting it from the system's total capacity of 5 ounces. Install the compressor mounting bracket and bolts, tightening them to 35 ft. lbs (48 Nm), then attach the compressor to the bracket and tighten the mounting bolts to 18 ft. lbs. (25 Nm). Install the compressor belt and tension it to 9-11mm of deflection with 22 lb. of force applied between the pulleys, tightening the adjusting bolt and the lock nut on the tension pulley to 35 ft. lbs. (48 Nm). Connect the hoses to the compressor and tighten them to 22 ft. lbs. (30 Nm). Reposition the power steering pump if equipped and install the power steering belt. Finally, reconnect all wires and the negative battery cable, properly charge the air conditioning system, and check its operation.


