×
- Live Chat
- 1-888-984-2011

My Garage
My Account
Cart
Genuine Honda Ridgeline Exhaust Valve
Exhaust Muffler Valve- Select Vehicle by Model
- Select Vehicle by VIN
Select Vehicle by Model
orMake
Model
Year
Select Vehicle by VIN
For the most accurate results, select vehicle by your VIN (Vehicle Identification Number).
1 Exhaust Valve found
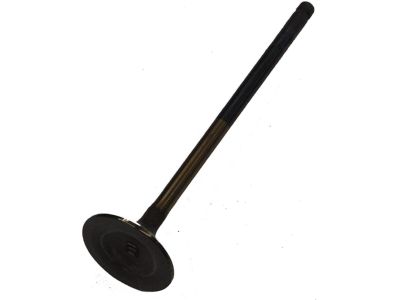
Honda Ridgeline Exhaust Valve
The Exhaust Valve in Honda Ridgeline vehicles is one of the vital components of internal combustion engine that controls the outflow of burnt exhaust gases from the engine cylinder. This is a very useful process to ensure that the engine works at its prime and does not consume much of the fuel. If the Exhaust Valve is damaged it can result in a large number of problems including loss in power, inability to ignite, rough running and reduced gas mileage. Although the table for overview does not categorize the Exhaust Valves in terms of type/ style depending on the Ridgeline models, the use stays the same. The proper functioning of the Exhaust Valve is very crucial to control and balance the engine operation to avoid troubles that may be caused by back pressure from exhaust gasses.
In search of affordable OEM Honda Ridgeline Exhaust Valve? Consider browsing through our extensive inventory of genuine Honda Ridgeline Exhaust Valve. Not only do we provide market-leading prices and a manufacturer's warranty, but we also pride ourselves on exceptional customer service and swift delivery.
Honda Ridgeline Exhaust Valve Parts Questions & Experts Answers
- Q: How to check and adjust valve clearances for the Honda Ridgeline?A: The valve clearance generally does not need adjustment unless valve train components have been replaced or a valve job has been performed, or if the valves are noisy. The simplest check for proper valve adjustment is to listen carefully to the engine running with the hood open. If the valve train is noisy, adjustment is necessary. The valve clearance must be checked and adjusted with the engine cold. Remove the valve covers. Rotate the crankshaft clockwise and position the number one piston at TDC. When positioned correctly at TDC, the pointer on the front timing belt cover will align with the sprocket mark. In this position, adjust the valves for cylinder number one. There are four valves for each cylinder. Starting with the intake valve, insert a feeler gauge of the correct thickness between the valve stem and the Rocker Arm. Withdraw it; you should feel a slight drag. If there's no drag or a heavy drag, loosen the adjuster nut and back off the adjuster screw. Carefully tighten the adjuster screw until you can feel a slight drag on the feeler gauge as you withdraw it. Hold the adjuster screw with a screwdriver to keep it from turning and tighten the locknut. Recheck the clearance to make sure it hasn't changed. Repeat the procedure on the other intake valve, then on the two exhaust valves. Rotate the crankshaft pulley clockwise until the number 4 on the camshaft sprocket is aligned with the pointer on the timing belt cover. Check and adjust the number 4 cylinder valves. Rotate the crankshaft pulley 120 degrees clockwise until the number 2 cylinder is at TDC. Check and adjust the number 2 cylinder valves. Rotate the crankshaft pulley clockwise, following the firing order, and adjust the remaining valves. Install the valve covers.


