Contact Us Live Chat or 1-888-984-2011
My Garage
My Account
Cart
Make sure this part fits

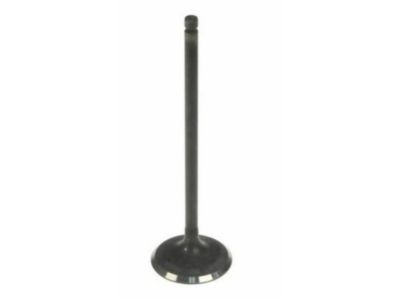
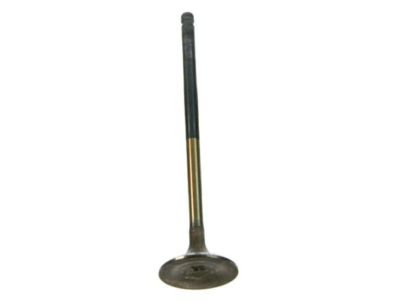
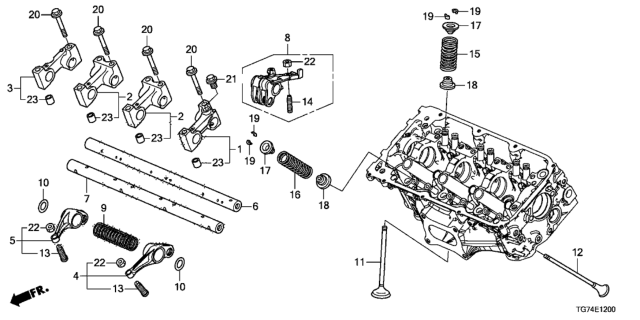
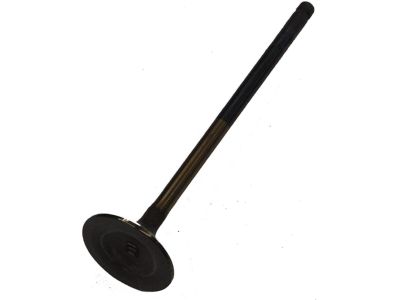
Honda 14721-P8E-A00 Valve, Exhuast

2002-2022 Honda 14721P8EA00

Customer Questions & Expert Answers (7)
Honda 14721-P8E-A00 Valve, Exhuast
  • Part Description
    Exhaust Valve
  • Manufacturer
    Honda
Make sure this part fits
$27.36 MSRP: $38.65
You Save: $11.29 (30%)
1
ADD TO CART
  • Related Parts
  • Product Specifications
  • Vehicle Fitment
  • Customer Questions & Expert Answers
  • Product Specifications

    BrandGenuine Honda
    Manufacturer Part Number14721-P8E-A00
    Part DescriptionExhaust Valve
    Other NamesValve
    Item Dimensions3.0 x 1.0 x 1.0 inches
    Item Weight0.50 Pounds
    ConditionNew
    Fitment TypeDirect Replacement
    Require Quantity6
    ManufacturerHonda
    SKU14721-P8E-A00
    WarrantyThis genuine Honda part is guaranteed by Honda's factory warranty.
    Shipping & ReturnShipping Policy Return Policy
    Warning: California’s Proposition 65
  • Vehicle Fitment

    Year Make Model Body & Trim Emission & Transmission
    2017 Honda Accord2 Door EX-L V6, 2 Door Touring (V6), 4 Door EX-L V6, 4 Door Touring (V6)KA 6AT, KA 6MT, KL 6AT
    2016 Honda Accord2 Door EX-L V6, 2 Door TRN-V6, 4 Door EX-L V6, 4 Door Touring (V6)KA 6AT, KA 6MT, KL 6AT
    2015 Honda Accord2 Door EX-L V6, 4 Door EX-L V6, 4 Door Touring (V6)KA 6AT, KA 6MT, KL 6AT
    2014 Honda Accord2 Door EX-L V6, 4 Door EX-L V6, 4 Door Touring (V6)KA 6AT, KA 6MT, KL 6AT, KL 6MT
    2013 Honda Accord2 Door EX-L V6, 4 Door EX-L V6, 4 Door Touring (V6)KA 6AT, KA 6MT, KL 6AT, KL 6MT
    2012 Honda Accord2 Door EX-L V6, 4 Door EX-L V6, 4 Door EX-V6KA 5AT, KA 6MT
    2011 Honda Accord2 Door EX-L V6, 4 Door EX-L V6, 4 Door EX-V6KA 5AT, KA 6MT
    2010 Honda Accord2 Door EX-L V6, 4 Door EX-L V6, 4 Door EX-V6KA 5AT, KA 6MT, KL 6MT
    2009 Honda Accord2 Door EX-L V6, 4 Door EX-L V6, 4 Door EX-V6, 4 Door EX-V6 (PZEV)KA 5AT, KA 6MT, KL 5AT, KL 6MT
    2008 Honda Accord2 Door EX-L V6, 4 Door EX-L V6, 4 Door EX-V6, 4 Door EX-V6 (PZEV)KA 5AT, KA 6MT, KL 5AT, KL 6MT
    View More
  • Customer Questions & Expert Answers

    Q:
    Does this fit my car? Posted by HondaPartsNow Specialist
    A:
    You can Select Your Vehicle to check if 14721-P8E-A00 fits your vehicle.
    Posted by HondaPartsNow Specialist
    Q:
    Do valve clearances generally need adjustment, and how is the proper valve adjustment checked and performed on Four cylinder engine on Honda Crosstour? Posted by Customer
    A:
    Valve clearances generally do not need adjustment unless valvetrain components have been replaced or a valve job has been performed. The simplest check for proper valve adjustment is to listen carefully to the engine running with the hood open; if the valvetrain is noisy, adjustment is necessary. The valve clearance must be checked and adjusted with the engine cold. Remove the valve cover and place the number 1 piston at Top Dead Center (TDC) on the compression stroke. With the engine in this position, the number 1 cylinder valve clearances can be checked and adjusted. Start with the intake valve clearance by inserting a feeler gauge of the correct thickness between the valve stem tip and the adjusting screw on the rocker arm. Withdraw it to feel a slight drag; if there's no drag or a heavy drag, loosen the adjuster nut and back off the adjuster screw. Carefully tighten the adjuster screw until a slight drag is felt on the feeler gauge upon withdrawal. Hold the adjuster screw with a screwdriver to keep it from turning and tighten the locknut, then recheck the clearance to ensure it hasn't changed. Repeat this procedure for the other intake valve and the two exhaust valves. Rotate the crankshaft pulley 180 degrees clockwise to bring the number 3 cylinder to TDC, then check and adjust the number three cylinder valves. Continue by rotating the crankshaft pulley 180 degrees clockwise to bring the number 4 cylinder to TDC and check and adjust those valves, followed by the number 2 cylinder valves after another 180-degree rotation. Finally, install the valve cover.
    Posted by HondaPartsNow Specialist
    Q:
    How to adjust valve clearance on Honda Odyssey? Posted by Customer
    A:
    The valve clearance generally needs to be changed if any valve train components have been changed, if a valve has been resurfaced or if there is a valve noise. To confirm that the valve gear is correctly adjusted, look at engine while the car is running with the bonnet open; if the valve train is clattering an adjustment is required. The engine should also be off when inspecting and setting the valve clearance; it is even better if the engine is cold. Start with the valve covers draining and then turn the crankshaft until the number one piston is at TDC while the pointer at the front timing bell cover is on the sprocket mark. In this position the valves for the cylinder number one which contains for valves are adjusted. First of the intake valve, introduce a feeler gauge of the right thickness between the stem of the valve and the rocker arm. When there is no drag at all or more than a slight drag, simply loose the adjuster nut and screw in the adjuster screw until the contact of the feeler gauge is felt slightly tight. Using a screwdriver, tighten the locknut after which a check on the clearance should be made to reveal that no change has occurred. The same procedure is done to the other intake valve and the two exhaust valves. After that turn the crankshaft pulley clockwise until the number four on the camshaft sprocket is on the same line with the pointer of the timing belt cover and then check and align the number four cylinder valves. Proceed to rotate the crankshaft pulley 120 degrees clockwise so that the number two cylinder is at TDC and then adjust the valves of that cylinder and then the other cylinders in accordance to the firing order.
    Posted by HondaPartsNow Specialist
    Q:
    How to check and adjust valve clearances for the Honda Ridgeline? Posted by Customer
    A:
    The valve clearance generally does not need adjustment unless valve train components have been replaced or a valve job has been performed, or if the valves are noisy. The simplest check for proper valve adjustment is to listen carefully to the engine running with the hood open. If the valve train is noisy, adjustment is necessary. The valve clearance must be checked and adjusted with the engine cold. Remove the valve covers. Rotate the crankshaft clockwise and position the number one piston at TDC. When positioned correctly at TDC, the pointer on the front timing belt cover will align with the sprocket mark. In this position, adjust the valves for cylinder number one. There are four valves for each cylinder. Starting with the intake valve, insert a feeler gauge of the correct thickness between the valve stem and the rocker arm. Withdraw it; you should feel a slight drag. If there's no drag or a heavy drag, loosen the adjuster nut and back off the adjuster screw. Carefully tighten the adjuster screw until you can feel a slight drag on the feeler gauge as you withdraw it. Hold the adjuster screw with a screwdriver to keep it from turning and tighten the locknut. Recheck the clearance to make sure it hasn't changed. Repeat the procedure on the other intake valve, then on the two exhaust valves. Rotate the crankshaft pulley clockwise until the number 4 on the camshaft sprocket is aligned with the pointer on the timing belt cover. Check and adjust the number 4 cylinder valves. Rotate the crankshaft pulley 120 degrees clockwise until the number 2 cylinder is at TDC. Check and adjust the number 2 cylinder valves. Rotate the crankshaft pulley clockwise, following the firing order, and adjust the remaining valves. Install the valve covers.
    Posted by HondaPartsNow Specialist
    Q:
    How to check and adjust valve clearances for the Honda Pilot? Posted by Customer
    A:
    The valve clearance generally does not need adjustment unless valve train components have been replaced or a valve job has been performed, or if the valves are noisy. The simplest check for proper valve adjustment is to listen carefully to the engine running with the hood open. If the valve train is noisy, adjustment is necessary. The valve clearance must be checked and adjusted with the engine cold. Remove the valve covers. Rotate the crankshaft clockwise and position the number one piston at TDC. When positioned correctly at TDC, the pointer on the front timing belt cover will align with the sprocket mark. In this position, adjust the valves for cylinder number one. There are four valves for each cylinder. Starting with the intake valve, insert a feeler gauge of the correct thickness between the valve stem and the rocker arm. Withdraw it; you should feel a slight drag. If there's no drag or a heavy drag, loosen the adjuster nut and back off the adjuster screw. Carefully tighten the adjuster screw until you can feel a slight drag on the feeler gauge as you withdraw it. Hold the adjuster screw with a screwdriver to keep it from turning and tighten the locknut. Recheck the clearance to make sure it hasn't changed. Repeat the procedure on the other intake valve, then on the two exhaust valves. Rotate the crankshaft pulley clockwise until the number 4 on the camshaft sprocket is aligned with the pointer on the timing belt cover. Check and adjust the number 4 cylinder valves. Rotate the crankshaft pulley 120 degrees clockwise until the number 2 cylinder is at TDC. Check and adjust the number 2 cylinder valves. Rotate the crankshaft pulley clockwise, following the firing order, and adjust the remaining valves. Install the valve covers.
    Posted by HondaPartsNow Specialist
    Q:
    What is the final step after adjusting all the valves for the 2010 Honda Crosstour? Posted by Customer
    A:
    Finally, install the valve covers.
    Posted by HondaPartsNow Specialist
    Q:
    When should the valve clearance be checked and adjusted for the 2011 Honda Accord? Posted by Customer
    A:
    The valve clearance must be checked and adjusted with the engine cold.
    Posted by HondaPartsNow Specialist
    If you have any questions about this product, please don't hesitate to ask us. We will be happy to help you!

Genuine Honda Part 14721-P8E-A00, the Right Choice

To ensure reliability, purchase Honda part # 14721-P8E-A00 Valve, Exhuast. It is sometimes referred to as Honda Exhaust Valve. In terms of quality, OEM parts are the wise choice for Honda owners who want to keep their vehicles at peak performance. They are manufactured to follow official strict factory specifications and are made in world-class facilities. They undergo rigorous tests to ensure that they are durable and safe to use. This part fits 2003-2017 Honda Accord, 2002-2022 Honda Odyssey, 2003-2022 Honda Pilot, 2006-2021 Honda Ridgeline.

HondaPartsNow.com is a leading supplier of genuine Honda parts and accessories such as Honda 14721P8EA00 Valve, Exhuast. When it comes to choosing the right parts for your vehicle, the solution is simple: shop from our wide selection of genuine Honda parts at competitive prices available on HondaPartsNow.com. We prioritize your convenience, 100% satisfaction, and peace of mind by offering a user-friendly catalog, manufacturer-warranted OEM Honda parts, a hassle-free return policy, and swift delivery service.

Why choose Honda Parts Now

  • Dedicated Service

    Your complete satisfaction is our #1 goal

  • Lowest Prices

    Best deals on genuine OE parts from dealerships

  • Fast Delivery

    Orders are processed and delivered promptly