×
- Hello
- Login or Register
- Quick Links
- Live Chat
- Track Order
- Parts Availability
- RMA
- Help Center
- Contact Us
- Shop for
- Honda Parts
- Honda Accessories

My Garage
My Account
Cart
Genuine Honda Prelude Steering Wheel
Navigation Steering Wheel- Select Vehicle by Model
- Select Vehicle by VIN
Select Vehicle by Model
orMake
Model
Year
Select Vehicle by VIN
For the most accurate results, select vehicle by your VIN (Vehicle Identification Number).
31 Steering Wheels found
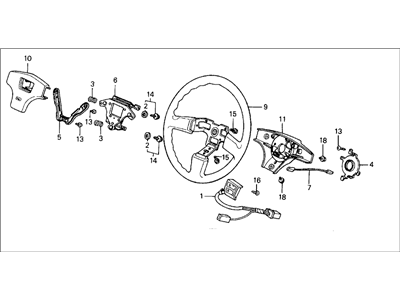
Honda Prelude Wheel Assembly, Steering (Nippon Purasuto)
Part Number: 53100-692-911$541.28 MSRP: $781.07You Save: $239.79 (31%)Honda Prelude Wheel, Steering (Graphite Black)
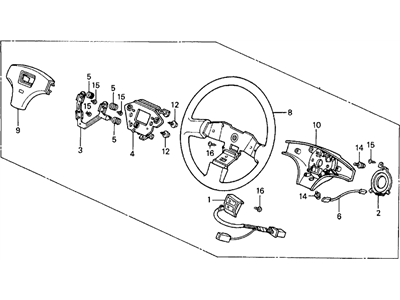
Part Number: 78510-SL5-A82ZC$679.61 MSRP: $980.68You Save: $301.07 (31%)Honda Prelude Wheel, Steering (Black) (Nippon Purasuto)
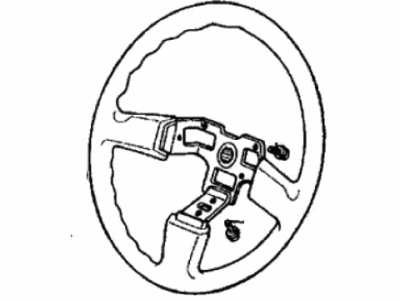
Part Number: 53110-SF0-672ZA$246.34 MSRP: $350.92You Save: $104.58 (30%)Honda Prelude Wheel, Steering (Black) (Nippon Purasuto)
Part Number: 78510-SF1-A22ZA$461.88 MSRP: $666.51You Save: $204.63 (31%)Honda Prelude Wheel, Steering (Black) (Tokyo Seat)
Part Number: 53110-SB0-014ZA$490.76 MSRP: $708.17You Save: $217.41 (31%)Honda Prelude Wheel, Steering (Black) (Nippon Purasuto)
Part Number: 53110-SB0-013ZA$490.76 MSRP: $708.17You Save: $217.41 (31%)Honda Prelude Wheel, Steering (Black) (Nippon Purasuto)
Part Number: 78510-SF1-A16ZA$461.88 MSRP: $666.51You Save: $204.63 (31%)Honda Prelude Wheel, Steering (Black) (Nippon Purasuto)
Part Number: 78512-SF1-A22ZA$392.13 MSRP: $565.85You Save: $173.72 (31%)Honda Prelude Wheel, Steering (Black) (Nippon Purasuto)
Part Number: 78512-SF1-A02ZA$392.13 MSRP: $565.85You Save: $173.72 (31%)Honda Prelude Wheel, Steering (Graphite Black)
Part Number: 78510-SS0-A31ZB$419.80 MSRP: $605.77You Save: $185.97 (31%)Honda Prelude Wheel, Steering (Black) (Ts Tech)
Part Number: 78510-SF1-A15ZA$461.88 MSRP: $666.51You Save: $204.63 (31%)Honda Prelude Wheel, Steering (Black) (Nippon Purasuto)
Part Number: 78510-SF1-A14ZA$461.88 MSRP: $666.51You Save: $204.63 (31%)Honda Prelude Wheel, Steering (Black) (Ts Tech)
Part Number: 78510-SF1-A13ZA$461.88 MSRP: $666.51You Save: $204.63 (31%)Honda Prelude Wheel, Steering (Black) (Nippon Purasuto)
Part Number: 78510-SF1-014ZA$461.88 MSRP: $666.51You Save: $204.63 (31%)Honda Prelude Wheel, Steering (Black) (Nippon Purasuto)
Part Number: 53110-SB0-003ZA$490.76 MSRP: $708.17You Save: $217.41 (31%)Honda Prelude Wheel Assembly, Steering (Tokyo Seat)
Part Number: 53100-692-004$495.56 MSRP: $715.11You Save: $219.55 (31%)Honda Prelude Wheel Assembly, Steering (Nippon Purasuto)
Part Number: 53100-692-003$495.56 MSRP: $715.11You Save: $219.55 (31%)Honda Prelude Wheel, Steering (Graphite Black)
Part Number: 78510-SL5-A83ZC$679.61 MSRP: $980.68You Save: $301.07 (31%)
| Page 1 of 2 |Next >
1-20 of 31 Results
Honda Prelude Steering Wheel
In search of affordable OEM Honda Prelude Steering Wheel? Consider browsing through our extensive inventory of genuine Honda Prelude Steering Wheel. Not only do we provide market-leading prices and a manufacturer's warranty, but we also pride ourselves on exceptional customer service and swift delivery.
Honda Prelude Steering Wheel Parts Questions & Experts Answers
- Q: How to remove and install Steering Wheel on Honda Prelude?A:The models equipped with a Supplemental Restraint System (SRS) that includes an air bag require caution when working near components such as impact sensors, the air bag module, steering column, and instrument panel; it is essential to disable the SRS beforehand. To handle the inflator module safely and avoid accidental deployment, never carry it by the wires or connector, hold it securely with both hands while ensuring the bag and trim cover are pointed away, place it on a surface with the bag facing up, and keep the area clear of objects that could be thrown in case of accidental deployment. Begin by disconnecting the negative and then the positive battery cables, disabling the air bag system, removing the access panel from the steering wheel bottom to access the electrical connector, detaching the connector between the air bag and the cable reel, and removing the side access panels and fasteners that mount the air bag to the steering wheel using a T-30 Torx bit. Carefully remove the air bag assembly while holding the padded surface away from your body, place it in a safe area with the padded surface facing up, and remove the electrical connectors for the horn and cruise control if equipped. Next, remove the steering wheel mounting fastener, ensure the steering wheel is centered in the straight-ahead position, matchmark the steering wheel to the splined steering shaft for proper alignment, and remove the steering wheel by rocking it side to side while pulling steadily or using a steering wheel puller if necessary. For installation, center the cable reel by pointing the arrow up, install the steering wheel ensuring proper engagement with the cable reel and turn signal canceling sleeve, tighten the steering wheel fastener to 29 ft. lbs. (39 Nm), attach all wires and harnesses, install the air bag assembly with new mounting fasteners torqued to 86 inch lbs. (9.8 Nm), install all covers, and connect the positive battery cable first followed by the negative. After installation, confirm the normal operation of all related equipment and ensure all controls are functioning properly.
Related Honda Prelude Parts
Browse by Year
2001 Steering Wheel 2000 Steering Wheel 1999 Steering Wheel 1998 Steering Wheel 1997 Steering Wheel 1996 Steering Wheel 1995 Steering Wheel 1994 Steering Wheel 1993 Steering Wheel 1992 Steering Wheel 1991 Steering Wheel 1990 Steering Wheel 1989 Steering Wheel 1988 Steering Wheel 1987 Steering Wheel 1986 Steering Wheel 1985 Steering Wheel 1984 Steering Wheel 1983 Steering Wheel 1982 Steering Wheel 1981 Steering Wheel 1980 Steering Wheel 1979 Steering Wheel


