×
- Live Chat
- 1-888-984-2011

My Garage
My Account
Cart
Genuine Honda Passport Variable Timing Sprocket
Timing Gear Sprocket- Select Vehicle by Model
- Select Vehicle by VIN
Select Vehicle by Model
orMake
Model
Year
Select Vehicle by VIN
For the most accurate results, select vehicle by your VIN (Vehicle Identification Number).
8 Variable Timing Sprockets found
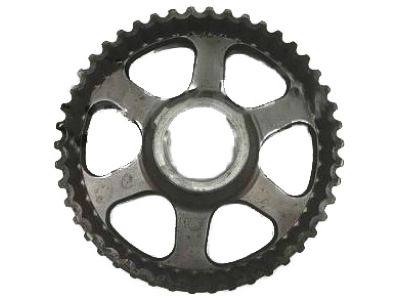
Honda Passport Pulley, Rear Timing Belt Driven
Part Number: 14270-RCA-A01$19.42 MSRP: $27.43You Save: $8.01 (30%)Honda Passport Pulley, Front Timing Belt Driven
Part Number: 14260-R70-A01$16.65 MSRP: $23.52You Save: $6.87 (30%)
Honda Passport Variable Timing Sprocket
In search of affordable OEM Honda Passport Variable Timing Sprocket? Consider browsing through our extensive inventory of genuine Honda Passport Variable Timing Sprocket. Not only do we provide market-leading prices and a manufacturer's warranty, but we also pride ourselves on exceptional customer service and swift delivery.
Honda Passport Variable Timing Sprocket Parts Questions & Experts Answers
- Q: How to properly replace a timing belt and Sprocket on 2.3L and 2.6L four cylinder engine on Honda Passport?A: Timing system is rather complicated and in case with mistiming it is possible to cause severe damage to the power plant, so this procedure should be accomplished only by skilled personnel. This is especially so if one is in a phase of doubt because it is always helpful to seek advice from an expert. Starting with the removal of negative battery terminal, and followed by the removal of cooling fan and shroud. Go ahead and pull the water pump pulley and align the No. 4 piston to the Top Dead Centre. Take out the drive belts and spark plugs, with the small proviso that some early models will have an air pump accompanied by its own drive belt and complete with air pump into its own compartment. Secondly, take off the crankshaft pulley, and, if there is, the air conditioning drive belt idler pulley. For power steering systems, you should then detach the pump and take it out of the bracket but the hydraulic hoses should not be disconnected. Disconnect and take off the upper and lower part of the timing belt cover with keeness to the rubber seals. Make sure that the camshaft timing mark matches with the lug on the front housing while the notch of crank sprocket matches with the pointer adjacent to the front oil seal housing. If the timing belt is being replaced then the orientation of rotation must be noted. There is a small tensioner bolt that can be loosened so as to create some space by pulling it back using a prybar with equal room made beneath the belt to remove the timing belt. Measure the belt for wear and damage, replace it if necessary and measure also the sprockets for wear or damage replace both sprockets at once. With the ignition off, turn the crankshaft via the emergency brake with at least two full turns and look for any form of opposition this could be due to a problem. Ensure the crankshaft and camshaft sprocket timing marks are lining, if the new belt is installed make sure the arrow points as it was before. Put the belt over the crankshaft sprocket, the sprocket of the oil pump, camshaft sprocket and the tensioner letting the tension of the belt for some time using a screw driver. Back off the screw so that only the spring bears against the face of the lock nut then tighten the screw. Engage the crankshaft sprocket bolt back and rotate the Crankshaft counterclockwise direction by two full rotations until the tension is pulled to both sides of the timing belt, repeat again the tension adjustment. Check the marks on the frame once again and check the belt tension as well since a well tensioned belt should be twisted no more than 90 degrees. Last but not the least reinstall the remaining parts in reverse order in which they were removed.


