×
- Live Chat
- 1-888-984-2011

My Garage
My Account
Cart
Genuine Honda Passport Center Link
Steering Drag Center Link- Select Vehicle by Model
- Select Vehicle by VIN
Select Vehicle by Model
orMake
Model
Year
Select Vehicle by VIN
For the most accurate results, select vehicle by your VIN (Vehicle Identification Number).
5 Center Links found
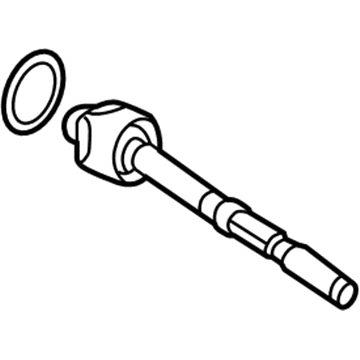
Honda Passport Repair Kit, Steering Unit
Part Number: 8-97170-435-0$11.75 MSRP: $96.33You Save: $84.58 (88%)
Honda Passport Center Link
The Center Link in Honda Passport cars is a metal connecting rod that connects the idler arm to the steering arm so as to ensure proper steering handle. This component is also known as the intermediate rod, track rod, or relay rod - they all serve the very important purpose of making the steering system work smoothly in the vehicle. Several Center Link designs have been used in Honda Passport throughout the years and some differences between them are not described in detail. The main role of the Center Link does not change significantly from one generation of the car to another and is to preserve the operation of the steering mechanism and improve drive characteristics of the Honda Passport.
In search of affordable OEM Honda Passport Center Link? Consider browsing through our extensive inventory of genuine Honda Passport Center Link. Not only do we provide market-leading prices and a manufacturer's warranty, but we also pride ourselves on exceptional customer service and swift delivery.
Honda Passport Center Link Parts Questions & Experts Answers
- Q: How to remove and install Center Link and Tie Rod End on Honda Passport?A: Any process of removing and installing the steering linkage requires the use of the front end of the automobile which must be lifted and supported on jackstuds. Before the removal of any steering linkage take a Ball Joint separator which can be screw puller type or the wedge type although the latter may damage the ball joint seals. It is also possible to free a balljoint taper pin by putting a suitable hammer against each resultant face of the eye; it is however usually cramped. This kind of means that after fitting any of the steering linkage parts be sure to have the front wheel alignment at a professional alignment shop. For the 1989 through 1997 models remove the outer jam nut and paint the relationship between the outer tie-rod end and the tie-rod shaft white. Ip out cotter pin and castle nut on the ball joint stud and then use small puller to remove the outer tie rod end from the steering knuckle arm. If it is necessary to replace the inner tie-rod end balljoint then it should be disconnected from the central link by unscrewing the jam nut with notice of threads, pulling off the cotter pin, unscrewing the castle nut and using a small puller. Before tightening it to fit a new tie-rod end, one fits it onto the tie-rod until it gets up to the mark before slightly tightening the jam nut to meet the rod end. Align the tie-rod ends perpendicular to each other and then fix the same with the jam nuts. The rest of the installation is the reveres of removal to check that the castle nuts have been tightened to their required torque. For the Pitman arm remove the nut which holds it to the steering gear sector shaft, mark the Pitman arm and the shaft during refitting so that they will align correctly, use a puller to free it from the splines of the shaft. Loosen and take off the cotter pin and the castle nut that joins the Pitman arm to the center link by means of a puller. Disassembly is the reverse of installation and requires the use of a wrench to loosen the nuts to the required torque and replacing a worn cotter pin with a new one. For the idler arm remove the cotter pin and loosen the castle nut, for the ball joint stud fit a puller and unbolt the idler arm from the frame. Disconnect the tie-rod ends, Pitman arm, and idler arm from the center link; the procedure for this is the same for removal and installation with the requirement that all the nuts should be tightened to the torque. For the steering damper, unscrew the cotter pin/nut/washer at the bolt connecting it to the center link and then the attachment to the cross member or the idler arm bracket and then pulling off the steering damper form the vehicle, while to replace it reverse the procedure. On all 1998 and newer models, use a wrench to take off the jam nut and put a marker to denote the position of the outer tie-rod end with regard to the tie-rod and take off the castle nut on the balljoint stud and then use a small puller to remove the outer tie-rod end from the steering knucle arm. When fitting a new tie-rod end, thread it on to the tie-rod up to the arrow, then screw on the jam nut until it engages the rod end but do not over tighten on the rod end. Place the stud of the tie-rod end balljoint firmly to the hole provided in the steering knuckle arm and tighten the nut to the recommended tightness.


