×
- Live Chat
- 1-888-984-2011

My Garage
My Account
Cart
Genuine Honda Fit Timing Chain
Engine Timing Chain- Select Vehicle by Model
- Select Vehicle by VIN
Select Vehicle by Model
orMake
Model
Year
Select Vehicle by VIN
For the most accurate results, select vehicle by your VIN (Vehicle Identification Number).
3 Timing Chains found
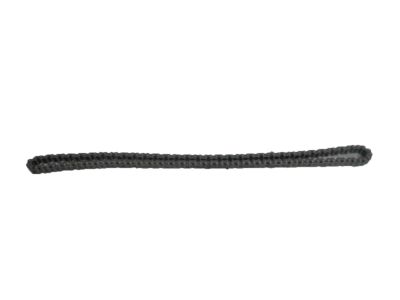
Honda Fit Chain (170L) (Borg Warner)
Part Number: 14401-5K9-004$141.75 MSRP: $201.92You Save: $60.17 (30%)
Honda Fit Timing Chain
The Timing Chain is a small chain located in the Honda Fit vehicles that are responsible for regulating the rotation of the camshaft and the crankshaft so as to allow proper timing of the valves for maximum efficiency of the car's engine. Used at the front of the engine the Timing Chain like other chains found within car engines needs its chain lubrication so as to run smoothly and they are normally characteristics of high engines' displacement. While metal Timing Chains have been around for some time, rubber timing belts have taken a back seat in the automotive industry since 1990s because of their wear out nature and also high replacement frequency. The Honda Fit mostly employ a metal Timing Chain, however, it has been known to have problems with lubrication and the tensioner and chain guides. An usual sign indicating that the timing chain system is drained is when the engine at the front emits an annoying rattle sound. In general, the design of timing chain in Honda Fit is focused on long lasting features and this enhances the performance of the vehicle in general.
In search of affordable OEM Honda Fit Timing Chain? Consider browsing through our extensive inventory of genuine Honda Fit Timing Chain. Not only do we provide market-leading prices and a manufacturer's warranty, but we also pride ourselves on exceptional customer service and swift delivery.
Honda Fit Timing Chain Parts Questions & Experts Answers
- Q: How do you remove and install the timing chain and Sprocket on Honda Fit?A: To take out the components reach the back of the unit and detach the wire from the negative terminal of the battery. Bring the engine to TPC for cylinder number 1 and take off the Valve Cover. Ensure the Camshaft is at TDC for the No 1 cylinder by aligning the 'UP' mark on the camshaft sprocket with some lines on the sprocket, the lines should be parallel with the cylinder head surface. Subsequently, eliminate the timing chain cover from the engine. For the year 2008 and models prior to that let's now remove the Crankshaft Position Sensor pulse plate on the front part of the crankshaft. Take the measurement of the proximal end to the closest part; if the distance is less than 19/32-inch (15 mm), replace the chain and the tensioner. Put clean engine oil on the timing chain tensioner slider, screw a screwdriver to the tensioner, give equal pressure while taking the upper tensioner bolt and to slacken the lower bolt. Reduced the pressure and unbolt and take out the lower bolt and tensioner after which you remove the tensioner arm pivot bolt and the arm. Two bolts hold the chain guide at right side of the frame and you must unfasten them and take out the chain guide. To take off the camshaft sprocket turn the camshaft with an open end wrench turn the camshaft sprocket bolt counter clockwise and then take off the camshaft sprocket, crankshaft sprocket and the chain. Wash all subsystems of a solvent and dry by means of landing air; visually check the chain tensioner, timing chain guide, tensioner arm, timing chain and sprockets on operative signs of wear and damage and replace parts, if necessary. Make sure that on the crankshaft sprocket there is a proper alignment of the timing mark with that of the pointer given on the engine block as well as furthermore check whether the "UP" mark on the camshaft sprocket is at the top with index marks aligned. It should be fitted around the crankshaft sprocket with the plated link engaging the dot on the sprocket and then over the camshaft sprocket with the marks co-corresponding with the coloured chain links. Position the sprockets and chain, put on the sprockets for the crankshaft and camshaft, while using a camshaft wrench tighten the camshaft sprocket bolt. Integrate the timing chain guide and tensioner arm after which the bolts that hold them in place should be tightened to the recommended torque. Set the tensioner in the lower bolt finger tight position, lubricate with fresh engine oil and then put pressure on the screwdriver placing the upper tensioner bolt followed by tightening of both bolts to the recommended torque. Pull out the pin of the timing chain tensioner and rotate the crank shaft two full turns clockwise and again align the points in the image then check that it doesnot bind. The rest of the procedures done in this process are almost an undoing of the process followed during the removal of the above items and the last of which involves reconnecting the battery negative cable and taking the car for a spin to look out for any signs of leakage.


