×
- Hello
- Login or Register
- Quick Links
- Live Chat
- Track Order
- Parts Availability
- RMA
- Help Center
- Contact Us
- Shop for
- Honda Parts
- Honda Accessories

My Garage
My Account
Cart
Genuine Honda Fit Rocker Arm
Engine Rocker Arm- Select Vehicle by Model
- Select Vehicle by VIN
Select Vehicle by Model
orMake
Model
Year
Select Vehicle by VIN
For the most accurate results, select vehicle by your VIN (Vehicle Identification Number).
4 Rocker Arms found
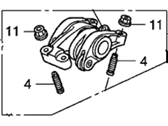
Honda Fit Arm Assembly, Exhuast Rocker
Part Number: 14625-5R0-000$66.92 MSRP: $94.52You Save: $27.60 (30%)Honda Fit Arm Assembly, Intake Rocker
Part Number: 14620-5R0-000$142.39 MSRP: $202.83You Save: $60.44 (30%)Honda Fit Arm Assembly, Rocker
Part Number: 14620-RB1-010$444.35 MSRP: $641.20You Save: $196.85 (31%)
Honda Fit Arm Assembly, Rocker
Part Number: 14620-PWC-010$390.56 MSRP: $563.58You Save: $173.02 (31%)
Honda Fit Rocker Arm
The Rocker Arm is instrumental in Honda Fit vehicles being a part of valvetrain system where it locates and helps to transfer motion of the pushrod into the intake and exhaust valves. Usualy made out of stamped steel or aluminum,the Rocker Arm transmits the up/down movement of the pushrod into the correct downward movement to move the valves. High-RPM automotive applications use aluminum for weight savings while lower strength, heavier, and more rigid materials such as cast iron or forged carbon steel are used in high-stress engines. Various types of Rocker Arms are roller rockers that have needle bearings to minimize friction and wear and thus improve its operational capacity. An advanced technology today in the newer Honda Fit engines is the rocker ratio that is 1.5:1 - 1.8:1 to enable higher camshafts lift to make the engines more efficient. The improved fulcrum bearings are also used in high-RPM Honda Fit models for a constant stress and durability to allow high performance in various conditions.
In search of affordable OEM Honda Fit Rocker Arm? Consider browsing through our extensive inventory of genuine Honda Fit Rocker Arm. Not only do we provide market-leading prices and a manufacturer's warranty, but we also pride ourselves on exceptional customer service and swift delivery.
Honda Fit Rocker Arm Parts Questions & Experts Answers
- Q: How do you remove and reassemble the valve cover and rocker arm assembly on Honda Fit?A:To remove the Valve Cover, position the number one piston at Top Dead Center. Loosen the rocker arm valve lash adjustment nuts and unscrew the adjustment screws if necessary. For 2008 and earlier models, use rubber bands to secure the companion intake rockers together before removal, which is advisable for all models to prevent the piston from pushing the rockers apart. Loosen the rocker arm shaft assembly mounting bolts two turns at a time until the spring pressure is relieved, then lift the rocker arms and shaft assembly from the Cylinder Head, noting the dowel pin on the chain end. Caution is advised as the rocker arm pistons, located between the secondary intake rocker arms, are spring-loaded and can come apart once removed. If disassembling and inspecting the rocker arm assembly, slip the rocker arms, pistons, and springs off the shafts from the chain end, ensuring to mark the relationship of the components for reassembly. Clean the components thoroughly and inspect for wear and damage, checking the rocker arm faces, tips, and shaft surfaces for scoring and excessive wear, replacing any damaged parts. Manually push each rocker arm piston to ensure smooth movement; if not, replace the rocker arm set and lubricate the pistons during assembly. Lubricate all components with engine assembly lubricant or engine oil and reassemble the rocker arms onto the shafts in order from the chain end, holding them together with rubber bands. Install the rocker arm assembly to the cylinder head, applying clean engine oil to the bolt beads and threads, and tighten the bolts in sequence to the specified torque, ensuring to snug them down evenly before applying the final torque. Remove the rubber bands from the rocker arms and adjust the valve clearances. The remainder of the installation follows the reverse order of removal, after which run the engine to check for oil leaks and proper operation.


