×
- Live Chat
- 1-888-984-2011

My Garage
My Account
Cart
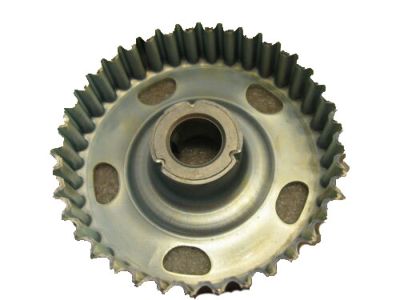
Genuine Honda Del Sol Variable Timing Sprocket
Timing Gear Sprocket- Select Vehicle by Model
- Select Vehicle by VIN
Select Vehicle by Model
orMake
Model
Year
Select Vehicle by VIN
For the most accurate results, select vehicle by your VIN (Vehicle Identification Number).
5 Variable Timing Sprockets found
Honda Del Sol Pulley, Timing Belt Drive
Part Number: 13621-P72-A01$122.70 MSRP: $174.78You Save: $52.08 (30%)Honda Del Sol Pulley, Timing Belt Driven
Part Number: 14211-P2E-003$71.83 MSRP: $101.45You Save: $29.62 (30%)Honda Del Sol Pulley, Timing Belt Driven
Part Number: 14210-PM3-000$75.72 MSRP: $106.95You Save: $31.23 (30%)
Honda Del Sol Variable Timing Sprocket
In search of affordable OEM Honda Del Sol Variable Timing Sprocket? Consider browsing through our extensive inventory of genuine Honda Del Sol Variable Timing Sprocket. Not only do we provide market-leading prices and a manufacturer's warranty, but we also pride ourselves on exceptional customer service and swift delivery.
Honda Del Sol Variable Timing Sprocket Parts Questions & Experts Answers
- Q: How to remove and install Timing Belt and Sprocket on Honda Del Sol?A: The timing system is rather intricate, and any mishap thereby can result to terrible detrimentation of the engine and therefore, should only be done by very experienced people. Start with turning off the vehicle and removing the negative battery terminal and then put blocks behind the rear wheels and engage the parking brake. When you are in the left front of the car, open the hood and remove the lug nuts of the wheel without taking off the wheel and then using the jack lift the car and place the jackstands below. Take off the left front wheel so as to get a more straightforward view at the crankshafthaft and then place the motor on support using a floor jack, placing a wood block under the Oil Pan in order not to scratch it. New engines require the removal of left Engine Mount, spark plugs, and drive belts and placing the number 1 piston at Top Dead Center. Take off the Valve Cover and upper timing belt cover, in addition to the alternator and its bracket, and then loosen the power steering pump though you don't need to disconnect its hoses. For the air conditioning vehicles, remove the wires and unscrew the bolts of the air conditioning compressor although refrigerant hoses do not require to be disconnected. Release the flywheel inspection cover, and, at the same time, prevent the crankshaft pulley from rotating while undoing the bolt that secures the pulley to the crankshaft. Pull down the pulley and detach the water pump pulley, the lower timing belt cover have to be removed too. In cases where the timing belt is to be reused, the orientation of the timing belt sprocks and direction of rotation should be noted. Pull the tensioner and unscrew the tensioner bolt, remove the outer belt cover and the belt. If replacing the crankshaft oil seal, then the sprocket and the inner belt guide should be removed. When removing Camshaft, it is advisable to use a screwdriver in order not to allow the bolt and sprocket to rotate. Check the belt tensioner pulley for free movement and realistic rotation and replace it, check the timing belt for any signs of teeth/groove wear, cracks and oil contamination and replace the belt if any of them are seen. But prior to starting the engine, the crankshaft has to be manually turned at least two times round to feel for the spin or any form of resistance. Any removed sprockets should be replaced and the Woodruff key inserted; the camshaft sprocket should sit flush with the cylinder head. Re-bolt the crankshaft pulley loosely and fit the timing belt loosely with a slight tension on the tensioner and then tighten the tensioner bolt. Rotate the crankshaft another two times-make sure that the timing marks will line up, and if you feel any binding, then go remove the belt and check the installation. Finally replace the rest of parts in reverse sequence and start the engine to verify its working.


