×
- Live Chat
- 1-888-984-2011

My Garage
My Account
Cart
Genuine Honda CRX Wiper Switch
Windshield Wiper Switch- Select Vehicle by Model
- Select Vehicle by VIN
Select Vehicle by Model
orHonda
CRX
Year
Select Vehicle by VIN
For the most accurate results, select vehicle by your VIN (Vehicle Identification Number).
4 Wiper Switches found
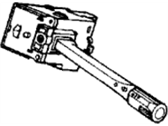
Honda CRX Wiper Switch
In search of affordable OEM Honda CRX Wiper Switch? Consider browsing through our extensive inventory of genuine Honda CRX Wiper Switch. Not only do we provide market-leading prices and a manufacturer's warranty, but we also pride ourselves on exceptional customer service and swift delivery.
Honda CRX Wiper Switch Parts Questions & Experts Answers
- Q: How do you remove and install the Wiper Switch on Honda CRX?A: For the model year 1988-91 with the goal of the removal and installation of the switch, one has to disconnect the negative battery cable. Subsequently, the upper and lower steering column covers has to be unbolted and the connectors can be pulled off from the switch. Following that, input/output switch retaining screws that hold the switch in place should be unscrewed and then the switch ought be slid out of the way. Replace the new switch in the position and tighten the electrical leads then reinstall the upper and lower steering column covers back.


