×
- Live Chat
- 1-888-984-2011

My Garage
My Account
Cart
Genuine Honda CRX Crankshaft Seal
- Select Vehicle by Model
- Select Vehicle by VIN
Select Vehicle by Model
orMake
Model
Year
Select Vehicle by VIN
For the most accurate results, select vehicle by your VIN (Vehicle Identification Number).
4 Crankshaft Seals found
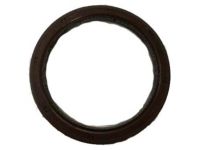
Honda CRX Oil Seal (80X100X10) (Nok)
Part Number: 91214-PLE-003$32.53 MSRP: $45.95You Save: $13.42 (30%)
Honda CRX Crankshaft Seal
The Crankshaft Seal is one of the components of Honda CRX vehicles, situated at the front part of the engine which serves to prevent leakage of oil in the crankcase. This is round seal is usually made through the use of metal and rubber Composed in this fashion, this seal has the responsibility of keeping engine lubrication in place so as to decrease the friction of parts of the engine and consequently decrease their wear out. With time, a Honda CRX may show symptoms such as it is having a wear out or spoiled Crankshaft Seal especially when it has undergone several miles or showing signs of oil leakage. Crankshaft Seal ought to be checked often and replaced as soon as possible to enhance the durability and performance of the Honda CRX engine.
In search of affordable OEM Honda CRX Crankshaft Seal? Consider browsing through our extensive inventory of genuine Honda CRX Crankshaft Seal. Not only do we provide market-leading prices and a manufacturer's warranty, but we also pride ourselves on exceptional customer service and swift delivery.
Honda CRX Crankshaft Seal Parts Questions & Experts Answers
- Q: How do you remove and install Crankshaft Seal and Timing Cover on Honda CRX?A: To do any real work removing and replacing components, you'll need to first detach the negative battery cable and complete a proper lift of the car. Then, the left front wheel and the tire assembly had to be taken off and, after that, the left front wheel well splash shield. If so required, unbolt the power steering belt and pump, and if there is an air conditioning system, then unbolt the adjust pulley with bracket as well as strip off the belt. Go ahead and pull off the power steering bracket, free the alternator adjust bolt and through bolt and then the alternator belt. Move under the engine, mount a suitable device to support the engine and then remove the engine side support bolts and nut and then the side mount rubber. Then, the valve cover should be removed together with the bolt of the crankshaft pulley and the pulley itself; in addition the upper and lower timing covers need to be taken off. In terms of installation works, consider the following opposite to the above mentioned removal procedures, using the engine oil to the crankshaft, tightening the bolt, indicated torque of 1120Kg.cm. The torque is 115 Nm for 1984-88 models or 119 ft. lbs. The total output was 165 Nm for the models of 1988-91. To replace the oil seal firstly, remove the negative terminal of the battery, then to remove the timing cover and the Timing Belt, further to remove the crankshaft timing sprocket. Apart from using a screw driver, use an appropriate seal removal tool to remove the seal from the front of the engine. As for the installation, the necessary steps are the reverse of the disassembly process, with slight addition: prior to the sealing, it is needed to lubricate the seal clip with thin layer of oil and then, using a suitable seal driver, the seal must be installed so that the open part of the spring was located inside the engine.


