×
- Hello
- Login or Register
- Quick Links
- Live Chat
- Track Order
- Parts Availability
- RMA
- Help Center
- Contact Us
- Shop for
- Honda Parts
- Honda Accessories

My Garage
My Account
Cart
Genuine Honda CRX CV Boot
Axle Boot- Select Vehicle by Model
- Select Vehicle by VIN
Select Vehicle by Model
orMake
Model
Year
Select Vehicle by VIN
For the most accurate results, select vehicle by your VIN (Vehicle Identification Number).
24 CV Boots found


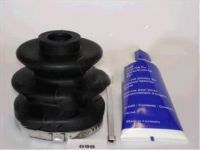
Honda CRX Boot, Driver Side Inboard
Part Number: 44315-SB2-003$2.56 MSRP: $20.98You Save: $18.42 (88%)Honda CRX Boot, Outboard (Otsuka)
Part Number: 44333-SB2-962$13.02 MSRP: $18.38You Save: $5.36 (30%)


| Page 1 of 2 |Next >
1-20 of 24 Results
Honda CRX CV Boot
CV Boot of Honda CRX vehicles', is a CV Joint Shield, a very important component of vehicles that is responsible for protecting the Constant Velocity (CV) Joints. This free fitting rubber or plastic cover contains and holds the required lubricant for the CV joints but at the same time it does not allow dirt and dust to intrude to affect the efficiency. Different types of CV joints have been used on Honda CRX models for many years, Rzeppa joints for the outer ends, tripod or double offset joints for the inner ends. The outer CV joints deal with high angles in comparison with the inboard joints that deal with changes in the shaft length due to suspension movement. CHECK CV BOOT: It is very important that CV Boot be checked regularly and if one is found with cracks or tears it should be replaced without delay since the eventual breakdown of the CV joint affects the functioning of the entire Honda CRX.
In search of affordable OEM Honda CRX CV Boot? Consider browsing through our extensive inventory of genuine Honda CRX CV Boot. Not only do we provide market-leading prices and a manufacturer's warranty, but we also pride ourselves on exceptional customer service and swift delivery.
Honda CRX CV Boot Parts Questions & Experts Answers
- Q: How do you remove and install the CV Boot and CV Joint on Honda CRX?A:To remove and install the halfshaft, first raise and safely support the vehicle. Begin by removing the halfshaft. If replacing the inboard CV-joint boot, secure the halfshaft in a suitable holding fixture for disassembly. Remove the boot bands, cutting them if they are welded, then push the CV-joint boot away from the halfshaft to access the CV-joint. Mark components during disassembly for proper reassembly, then remove the inboard CV-joint and the CV-joint boot. For installation, reverse the removal steps, checking CV-joint components for wear and replacing as necessary, while thoroughly packing the inboard CV-joint and boot with molybdenum disulfide grease and installing new boot bands. If replacing the outboard CV-joint boot, again secure the halfshaft in a fixture, remove the inboard CV-joint and boot without disassembling the outboard CV-joint, then remove the boot bands and the outboard CV-joint boot. For installation, reverse the removal steps, ensuring to thoroughly pack the outboard CV-joint boot with molybdenum disulfide grease and install new boot bands. Finally, install the halfshaft in the reverse order of removal.


