×
- Live Chat
- 1-888-984-2011

My Garage
My Account
Cart
Genuine Honda CRX Cooling Fan Assembly
Engine Cooling Fan- Select Vehicle by Model
- Select Vehicle by VIN
Select Vehicle by Model
orMake
Model
Year
Select Vehicle by VIN
For the most accurate results, select vehicle by your VIN (Vehicle Identification Number).
8 Cooling Fan Assemblys found
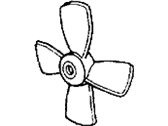
Honda CRX Cooling Fan Assembly
The Cooling Fan Assembly in Honda CRX vehicles is important bearing the responsibility of blowing air on the radiator with a view of maintaining the correct temperature of the engine. This assembly normally has a fan blade which is located near the radiator to cool hot coolant before it is pumped back into the engine, a mounting shroud and a motor. Many Honda CRX models uses both the mechanical and electric cooling fans. The mechanical fans are thereby coupled directly to the water pump shaft and utilize thermal clutch to engage efficiently at high rpm's while lowering noise and fuel consumption. On the other hand, the electric fans with a 12V motor work depending on the coolant temperature and air conditioning requirements hence keeping the car and its cabin cool even when the car is stationary. The design of the Cooling Fan Assembly may vary across different Honda CRX models, but the core function remains the same: for proper cooling of engines to prevent overheating and therefore, have to be sourced separately.
In search of affordable OEM Honda CRX Cooling Fan Assembly? Consider browsing through our extensive inventory of genuine Honda CRX Cooling Fan Assembly. Not only do we provide market-leading prices and a manufacturer's warranty, but we also pride ourselves on exceptional customer service and swift delivery.
Honda CRX Cooling Fan Assembly Parts Questions & Experts Answers
- Q: How do you test and install a cooling fan on Honda CRX?A: To check the cooling fan, turn the ignition switch to 'ON' position and on checking the thermo-switch, it should ground and therefore complete the circuit when the temperature of the engine is right. Check the wiring, the relay and the control unit and, if the thermo-switch is burnt or damaged, change it. Loosen the nut specified by the dot on both terminals of the cooling fan, turn the ignition switch to the 'ON' position, reconnect the cooling fan wire connector, then apply 12 volts to terminal A and ground terminal B of the connector indicated by the red arrow; if the cooling spins in any way other than smoothly and quietly, replace the cooling fan. For removal the negative battery cable should be disconnected, the cooling system should be drained and the upper hose if necessary should be removed. The fan motor wire connector must be disconnected by releasing two retaining clips seen from the rear of the hub, then the fan shroud attaching bolts are removed; after that, the fan and shroud as an assembly are removed while the fan and motor are taken off from the assembly of the shroud. For installation, screw the fan on the Radiator and tighten the mounting bolts to 7 ft lbs. The electrical lead should be reconnected, the upper hose connected and cooling system topped up if required, with each stage being performed 10 Nm at a minimum.


