×
- Live Chat
- 1-888-984-2011

My Garage
My Account
Cart
Genuine Honda Crosstour Timing Chain
Engine Timing Chain- Select Vehicle by Model
- Select Vehicle by VIN
Select Vehicle by Model
orMake
Model
Year
Select Vehicle by VIN
For the most accurate results, select vehicle by your VIN (Vehicle Identification Number).
2 Timing Chains found
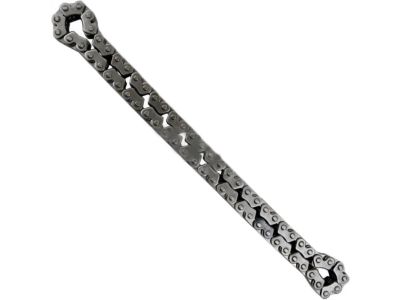
Honda Crosstour Timing Chain
The Timing Chain in Honda Crosstour automobiles is used to make the crankshaft and the camshaft rotational speed to match in order to enable optimal valve timing that is important for efficient engine performance. The Timing Chain is situated at the front part of the engine requires lubrication and is usually fitted to higher displacement engines. While it can be argued that metal timing chains have been demanded after 1990s more than rubber timing belt because they last longer and do not require constant replacement. Even though the Honda Crosstour mainly deals with Metal Timing Chain, problems can be based on the lack of lubrication or problems with the tensioner along with the chain guides. One sign for the failure of the Timing Chain system is a knocking sound coming from the front of the engine. In general, the timing chain that is installed in the Honda Crosstour is intended to be durable and dependable, and plays a huge role towards the performance of the vehicle.
In search of affordable OEM Honda Crosstour Timing Chain? Consider browsing through our extensive inventory of genuine Honda Crosstour Timing Chain. Not only do we provide market-leading prices and a manufacturer's warranty, but we also pride ourselves on exceptional customer service and swift delivery.
Honda Crosstour Timing Chain Parts Questions & Experts Answers
- Q: How do you remove and install the Timing Chain and Sprocket on Four cylinder engine on Honda Crosstour?A: To have access to the components one has to disconnect the cable on the negative terminal of the battery. Position the engine at Top Dead Centre for the number 1 cylinder, and then remove the Valve Cover along with the engine front cover. A small amount of rotation clockwise should be made in the crankshaft in order to screw into the holes a 0.05 inch (1.2 mm) pin and this will compress the chain tensioner, the other way round should be made in order to fix the pin. Then, dismantle all the bolts from the mounting and extract the timing chain tensioner and the upper timing chain guide between the camshaft sprockets and remove the camshaft timing chain guide, the tensioner arm, and the timing chain. For test or assembly, clean all parts by solvent and blow with compressed air free from oil, lubrication and dirt, then examine and check the chain tensioner for wear or damage and drain off any oil if refilling later. Inspect the timing chain guides, timing chain, and crankshaft and camshaft sprockets and replace any item that is suspect in its ability to provide long and worry-free service. During installation, if the crankshaft has been turned, be confident that the number one piston situated at the top dead centre with the timing mark situated in line with the pointer on the crankshaft sprocket. Place the chain alignment dots on the camshaft sprockets with the chain as follows; turn the sprockets until the alignment dots likes up. Fit the coloured link to the crank sprocket at full clockwise position and over the exhaust camshaft sprocket and the VTC actuator, such in a way that the dot is on the same colour of the chain link. Place the camshaft timing chain guide and the tensioner arm and tighten the bolts in the already mentioned torque limit;finally fit the timing chain tensioner and the upper timing chain guide and tighten the bolts in the already mentioned torque limit. Take out the pin in the timing chain tensioner, bolt on the valve cover and the engine front cover and rearrange the battery. Last, with the engine on, observe the presence of oil or coolant leaks.


