×
- Hello
- Login or Register
- Quick Links
- Live Chat
- Track Order
- Parts Availability
- RMA
- Help Center
- Contact Us
- Shop for
- Honda Parts
- Honda Accessories

My Garage
My Account
Cart
Genuine Honda Crosstour Hood
Engine Hood- Select Vehicle by Model
- Select Vehicle by VIN
Select Vehicle by Model
orMake
Model
Year
Select Vehicle by VIN
For the most accurate results, select vehicle by your VIN (Vehicle Identification Number).
1 Hood found

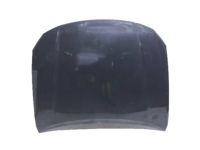
Honda Crosstour Hood, Engine (DOT)
Part Number: 60100-TP6-A90ZZ$790.68 MSRP: $1140.95You Save: $350.27 (31%)
Honda Crosstour Hood
In search of affordable OEM Honda Crosstour Hood? Consider browsing through our extensive inventory of genuine Honda Crosstour Hood. Not only do we provide market-leading prices and a manufacturer's warranty, but we also pride ourselves on exceptional customer service and swift delivery.
Honda Crosstour Hood Parts Questions & Experts Answers
- Q: How to remove and install a hood safely and correctly on Honda Crosstour?A:As will be seen when removing and installing the hood, it is recommend that at least two persons do it because of its weight as well as the awkwardness of its dimensions. First of all, it is necessary to cover the Fender and cowl panels with blankets or pads to protect them and the body and paint, respectively. Put pencil marks around the bolt heads and the top section of the Hood Hinges so that they may be easily aligned once more during the auto reassembly process. Remove any cables or wire harnesses that may hamper removal and for V6 models, remove the hood support strut bolted to the hood with emphasis on the metal clip for the 2006 and later models. With some help, bear the weight of the hood and get rid of the hinge to hood bolts before you pull of the hood. During installation, align the hood and ensure that the hinges fit within the scribe marks made earlier; if this has not been done or if the scribe marks are not anymore visible since you are installing a different hood, realign according to the marks made. Fine-tune the relative fore-and-aft and right-and-left positions of the hood by rotating it slightly and observing its movement as the set-screw engages the elongated holes in the hinges; score around the hinge plate to remind you of the adjustment. Turn the bolts and give minor corrections and then tighten the bolt while looking at the alignment. The Hood Latch assembly is also designed to be slidably mounted up and down as well as from side to side at the upper radiator support to obtain a tight fit flush with the fenders and use of reference lines to reposition the part. Also, rebend the hood at its leading edge and bring down the vertical height of the edge cushions to allow it to blend with the fenders. It is advised that the hood latch assembly and the hinges be lubricated with white lithium-base grease from time to time to reduce sticking and wear.


