×
- Live Chat
- 1-888-984-2011

My Garage
My Account
Cart
Genuine Honda Ridgeline Brake Booster
Brake Power Booster- Select Vehicle by Model
- Select Vehicle by VIN
Select Vehicle by Model
orMake
Model
Year
Select Vehicle by VIN
For the most accurate results, select vehicle by your VIN (Vehicle Identification Number).
4 Brake Boosters found
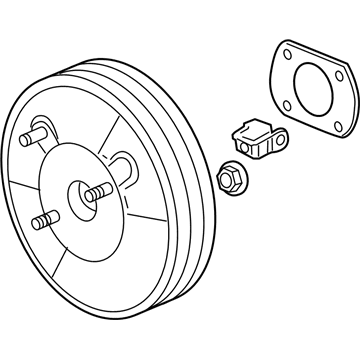
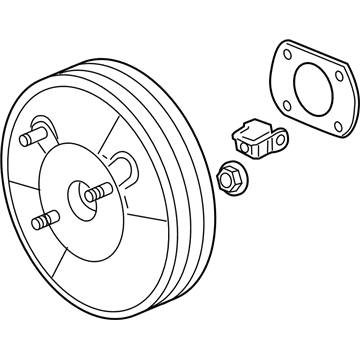
Honda Ridgeline Power Assembly, Master
Part Number: 46400-SJC-A01$390.10 MSRP: $562.92You Save: $172.82 (31%)Honda Ridgeline Power Assembly, Master
Part Number: 46400-SJC-A71$326.71 MSRP: $465.40You Save: $138.69 (30%)Honda Ridgeline Power Set, Master (10.5")
Part Number: 01469-TG7-A00$95.65 MSRP: $135.10You Save: $39.45 (30%)
Honda Ridgeline Brake Booster
The Brake Booster in Honda Ridgeline cars is an equipment that makes braking more effective and easier on the side of the driver. It mainly works through a vacuum system that magnifies the pressure exerted on the brake pedal, thus passing the excessive pressure on the master cylinder. This system makes it obtain and efficient one for braking and is considerably improved by the operator when the engine is engaged by the vacuum produced by the engine or an auxiliary pump. There are two main types of Brake Boosters utilized: vacuum operated as well as hydraulic boosters. Vacuum boosters are based on the difference in pressure between vacuum produced in the engine and that of atmospheric pressure while hydraulic boosters employ pressure from the power steering pump or an electrical motor. While vacuum boosters can be considered rather dependable, they do not operate without some malfunctions from time to time. It is possible that the choice between these types will be based on some specific demands to a vehicle and its performance characteristics; there are available various modifications of the diaphragms and their sizes to maximize the braking assist.
In search of affordable OEM Honda Ridgeline Brake Booster? Consider browsing through our extensive inventory of genuine Honda Ridgeline Brake Booster. Not only do we provide market-leading prices and a manufacturer's warranty, but we also pride ourselves on exceptional customer service and swift delivery.
Honda Ridgeline Brake Booster Parts Questions & Experts Answers
- Q: How to replace a power brake booster on Honda Ridgeline?A: Depress the brake pedal several times with the engine off and make sure that there is no change in the pedal reserve distance. Depress the pedal and start the engine. If the pedal goes down slightly, operation is normal. Start the engine and turn it off after one or two minutes. Depress the brake pedal several times slowly. If the pedal goes down farther the first time but gradually rises after the second or third depression, the booster is airtight. Depress the brake pedal while the engine is running, then stop the engine with the pedal depressed. If there is no change in the pedal reserve travel after holding the pedal for 30 seconds, the booster is airtight. Disassembly of the power unit requires special tools and is not ordinarily performed by the home mechanic. If a problem develops, it's recommended that a new or factory rebuilt unit be installed. Remove the master cylinder. On 2004 and earlier Honda models and 2001 and 2002 Acura models, disconnect the accelerator cable and cruise control cable from the throttle body. Disconnect the large vacuum hose from the power brake booster. In the passenger compartment, remove the joint pin and then disconnect the pushrod clevis from the brake pedal arm. Remove the nuts attaching the booster to the firewall. Carefully lift the booster unit away from the firewall and out of the engine compartment, being especially careful not to bend the hydraulic Brake Lines that are in front of the booster. To install the booster, place it into position and tighten the retaining nuts. Connect the pushrod to the brake pedal. The manufacturer states to use a new lock pin for the pushrod joint pin when installing the brake booster. Install the master cylinder. Reconnect the vacuum hose. Bleed the brakes. Carefully test the operation of the brakes before placing the vehicle in normal service. The pushrod length on these models must be adjusted for proper installation of the brake booster. Special tools are required for this procedure. It is recommended that the vehicle be towed to a dealer service department or other qualified repair shop for replacement of the power brake booster.
Related Honda Ridgeline Parts
Browse by Year
2023 Brake Booster 2022 Brake Booster 2021 Brake Booster 2020 Brake Booster 2019 Brake Booster 2018 Brake Booster 2017 Brake Booster 2014 Brake Booster 2013 Brake Booster 2012 Brake Booster 2011 Brake Booster 2010 Brake Booster 2009 Brake Booster 2008 Brake Booster 2007 Brake Booster 2006 Brake Booster


