×
- Live Chat
- 1-888-984-2011

My Garage
My Account
Cart
Genuine Honda Prelude Parking Brake Cable
Emergency Parking Brake Release Cable- Select Vehicle by Model
- Select Vehicle by VIN
Select Vehicle by Model
orMake
Model
Year
Select Vehicle by VIN
For the most accurate results, select vehicle by your VIN (Vehicle Identification Number).
20 Parking Brake Cables found
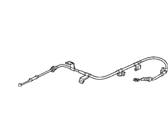
Honda Prelude Wire A, Driver Side Parking Brake
Part Number: 47560-SF0-013$45.68 MSRP: $66.20You Save: $20.52 (31%)Honda Prelude Wire A, Driver Side Parking Brake
Part Number: 47560-SS0-013$14.25 MSRP: $116.80You Save: $102.55 (88%)
Honda Prelude Parking Brake Cable
The Parking Brake Cable is an important component in Honda Prelude vehicles since it plays a critical role part of the parking brake system which keeps the car stationary particularly on a gradient. This cable links the parking brake, or the N emergency or handbrake, to the rest of the brake system to offer an important safety device. In the course of the years of Honda Prelude production, different models might have installed varying designs of Parking Brake Cable because the device is primarily intended to properly pull the parking brakes. A faulty Parking Brake Cable causes problems like low tension which will not hold the vehicle firm or the brake failure if the cable breaks. So, the Parking Brake Cable should be maintained on a regular basis to make sure that the parking brake will work and to provide protection to the vehicle in its parked state.
In search of affordable OEM Honda Prelude Parking Brake Cable? Consider browsing through our extensive inventory of genuine Honda Prelude Parking Brake Cable. Not only do we provide market-leading prices and a manufacturer's warranty, but we also pride ourselves on exceptional customer service and swift delivery.
Honda Prelude Parking Brake Cable Parts Questions & Experts Answers
- Q: How do you remove and install the Parking Brake Cable on Honda Prelude?A: To remove and install the parking brake system, first disconnect the negative battery cable, then loosen the lug nuts and safely raise the vehicle. Detach the parking brake switch electrical connector, release the parking brake lever, and disconnect the parking brake cable. Remove the parking brake lever assembly and the brake shoes as needed to access the cable attached to the brake shoe bracket, disconnecting the cable. Use a 12mm offset boxed end wrench to compress the cable-to-backing plate retainer and slide the cable through the backing plate. Remove the parking brake cable guide brackets from the vehicle's underbody and take out the cable. For installation, reverse the removal steps, ensuring the parking brake is properly adjusted upon completion. When adjusting, be cautious as an over-adjusted parking brake cable may hinder the rear brake self-adjusters. Check the hydraulic brake shoe adjustment if the shoes are worn, as a symptom of needing adjustment is an increase in pedal height or pressure after releasing the parking brake and pumping the pedal three times. Remove the screw covers, screws, and parking brake trim cover, then turn the adjuster to achieve the correct adjustment, ensuring the brakes do not drag when the parking brake lever is released. Reinstall the trim cover, lift the parking brake to engage two notches, and tighten the adjusting nut at the lever assembly until the rear brakes just begin to drag when rotated. After releasing the parking brake lever, verify that the wheels do not drag when turned, and ensure the parking brake engages in 3-5 notches with a force of 66 lbs. (294N) applied to the parking brake pedal before lowering the vehicle.
Related Honda Prelude Parts
Browse by Year
2001 Parking Brake Cable 2000 Parking Brake Cable 1999 Parking Brake Cable 1998 Parking Brake Cable 1997 Parking Brake Cable 1996 Parking Brake Cable 1995 Parking Brake Cable 1994 Parking Brake Cable 1993 Parking Brake Cable 1992 Parking Brake Cable 1991 Parking Brake Cable 1990 Parking Brake Cable 1989 Parking Brake Cable 1988 Parking Brake Cable 1987 Parking Brake Cable 1986 Parking Brake Cable 1985 Parking Brake Cable 1984 Parking Brake Cable 1983 Parking Brake Cable 1982 Parking Brake Cable 1981 Parking Brake Cable 1980 Parking Brake Cable 1979 Parking Brake Cable


