×
- Live Chat
- 1-888-984-2011

My Garage
My Account
Cart
Genuine Honda Fit Vapor Canister
Fuel Vapor Canister- Select Vehicle by Model
- Select Vehicle by VIN
Select Vehicle by Model
orMake
Model
Year
Select Vehicle by VIN
For the most accurate results, select vehicle by your VIN (Vehicle Identification Number).
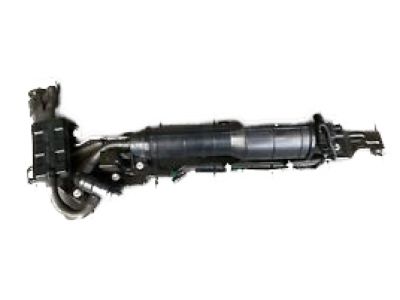
2 Vapor Canisters found
Honda Fit Vapor Canister
Vapor Canister in Honda Fit vehicles is an important part of the Evaporative Emissions Control (EVAP) system, which allows preventing hydrocarbon leakage into the atmosphere. It operates through the process where it collects fuel vapours from the fuel tank and supply them to the engine when required and burning them together with the air/fuel mixture. This is done through the use of a purge valve which ensures that there is a controlled release of the vapours. Through the years, the Honda Fit models have also employed different Vapor Canisters designs which include those that come with filter that can be replaced as well as those that have been specifically designed with enhanced diagnostic capabilities in order to help in detecting any leaks. The only distinction between these canisters is the design aspect and the presence of extra components including the canister vent solenoid and the fuel tank pressure sensor in the modern OBD II vehicles to enhance the performance of the system. All in all, the Honda Fit's Vapor Canister plays a critical role in emission and regulation to meet the standard set by the environment.
In search of affordable OEM Honda Fit Vapor Canister? Consider browsing through our extensive inventory of genuine Honda Fit Vapor Canister. Not only do we provide market-leading prices and a manufacturer's warranty, but we also pride ourselves on exceptional customer service and swift delivery.
Honda Fit Vapor Canister Parts Questions & Experts Answers
- Q: How do you remove and install the canister purge control solenoid valve and Vapor Canister on Honda Fit?A: The canister purge control solenoid valve is located on the throttle body. To initiate the process first of all, remove the hose and the electrical connector of the purge valve. At the 2008, and earlier models, to gain access to the guard, one has to undo the two nuts that retain the guard. Then, to remove the purge valve from the body, one has to undo the two stud bolts. To return the valve for 2009 and later models follow the same steps, but in the second step do not unscrew the nut, but rather just unbolt the valve and discard the nut. Installation is done in the reverse order, and a new O-ring is always put on and screws tightened properly. The EVAP canister is beneath the vehicle to the right side of the fuel tank and the FTP sensor is attached on top of the canister. Lift the car with a jack and put some stands under it, losing the fuel tank cover. Disconnect the hoses from the EVAP canister, which is probably possible only after undoing the canister mounting bracket. Further, you have to unscrew the canister mounting bracket bolts and now disconnect the connectors. I also unscrew the bolts to unlock the EVAP canister and the mounting bracket and so also the hose to the FTP this requires pulling out a retainer and finally taking out the FTP sensor from the canister. In this process, the new O-ring is installed for and FTP sensor, and is the exact opposite to the removal process. The EVAP canister vent shut valve is located directly in front of a canister. If you are thinking about Subaru Outback maintenance, begin with the elimination of the EVAP canister assembly; furthermore, it is necessary to disconnect the hoses of the vent shut valve as well as its electrical connector. The vent shut valve can be removed by unscrewing two mounting bolts. Further, to twist the lock tabs gently in order that you can pull the cap off and pull the valve off the valve body. The process of installation is the reverse of removal, and one must be certain to use a new O-ring. The EVAP canister filter is mounted close to the centerline of the vehicle on the top of the firewall if the vehicle is from 2007 or 2008 model while the 2009 and other models have the EVAP canister filter on a bracket just adjacent to the power brake booster. Pull off the air filter housing, take off the hoses from the EVAP canister filter. To remove the filter, unscrew the filter mounting nut or bolt, some models of car have their filter located in different positions and the removal process is relatively simple; while to install the filter, it is done in the reverse order of removing.


