×
- Live Chat
- 1-888-984-2011

My Garage
My Account
Cart
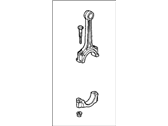
Genuine Honda Del Sol Connecting Rod
- Select Vehicle by Model
- Select Vehicle by VIN
Select Vehicle by Model
orMake
Model
Year
Select Vehicle by VIN
For the most accurate results, select vehicle by your VIN (Vehicle Identification Number).
3 Connecting Rods found
Honda Del Sol Connecting Rod
In search of affordable OEM Honda Del Sol Connecting Rod? Consider browsing through our extensive inventory of genuine Honda Del Sol Connecting Rod. Not only do we provide market-leading prices and a manufacturer's warranty, but we also pride ourselves on exceptional customer service and swift delivery.
Honda Del Sol Connecting Rod Parts Questions & Experts Answers
- Q: What steps should be taken before installing the piston and connecting rod assemblies on Honda Del Sol?A: When the piston and connecting rod assemblies are to be fitted, but before they are fitted, the cylinder walls should be free from any lubricant, the top edge of each cylinder should be chamfered, and the Crankshaft should be assembled. Carefully unscrew the cap of the number one connecting rod and, applying the marks made during dismantle, be sure to clean the bearing surfaces with the piece of cotton wool. According to received information it was recommended not to pick the new bearing inserts with fingers to avoid carrying contamination on gloves. Remove the old 'O' ring and clean the new one as well as the back side of the new upper bearing insert and position it into the connecting rod correctly in such a way that the tab fits into the recess without hammering or nicking the bearing face. If the crankshaft has been machined, or has any BEAM machining, fit standard bearings, otherwise use oversize bearings to match the connecting Rod Bearings according to their stamped numbers. Purge the area of other bearing insert's back side as well and then put it in the rod cap so that the tab should fit correctly; there is no need to lubricate it. Space the piston ring gaps around the piston with no two gaps being opposite each other on the piston's thrust surfaces areas. Place a section of hose over each connecting rod cap bolt, apply clean engine oil to rings in cylinder bore and push piston and rings into the bore with piston ring compressor intact with about a 1/2 inch sticking out of the skirt. Turn engine for the number one connecting rod journal and place it at the bottom dead center and lubricate the cylinder walls. Place the piston/connecting rod fully into the cylinder bore with the mark on the piston pointing towards the front of the vehicle and using the hammer lightly tap on the ring compressor to make sure that it locates itself on the block. Gently hit the piston with a wooden or plastic hammer handle so as to slide the connecting rod over the crankshaft journal without applying force that will harm the piston or the rings. During the final tightening process and after installation, check the P.C. for the oil clearance of the connecting rod bearing using Plastigage, make sure the marks on the cap and the rod match. Nuts must be tightened to the required torque in a step by step manner after which the cap is removed to read the Plastigage to ascertain the clearance. In the case that the above clearance is incorrect, then what may be required is a check on dirt or oil contamination or a check on the journal diameter. Remove any Plastigage gently, use a clean cloth to wipe off the grease, spread a thin layer of moly-base grease or engine assembly lube on the bearing surfaces and replace the connecting rod and cap and tighten the nuts to the prescribed torque. That is done for the rest of the assemblies and it is critical to maintain cleanness as well as the correct direction of the piston. After that turn a crankshaft in order to check for binding and the last preparatory step is to measure the counterweight endplay with pin of connecting rod which must not be over the specified limit. When necessary, resize at an automotive machine shop.


