×
- Live Chat
- 1-888-984-2011

My Garage
My Account
Cart
Genuine Honda Del Sol Brake Shoe Set
Brake Shoe- Select Vehicle by Model
- Select Vehicle by VIN
Select Vehicle by Model
orMake
Model
Year
Select Vehicle by VIN
For the most accurate results, select vehicle by your VIN (Vehicle Identification Number).
2 Brake Shoe Sets found
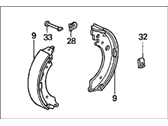
Honda Del Sol Brake Shoe Set
In search of affordable OEM Honda Del Sol Brake Shoe Set? Consider browsing through our extensive inventory of genuine Honda Del Sol Brake Shoe Set. Not only do we provide market-leading prices and a manufacturer's warranty, but we also pride ourselves on exceptional customer service and swift delivery.
Honda Del Sol Brake Shoe Set Parts Questions & Experts Answers
- Q: How to replace Brake Shoe on Honda Del Sol?A: Whenever the brake shoes are changed, the return and hold-down springs should also be changed because of the carrier and wear down due to the cycling type of heating and cooling characteristic which in turn will make the shoes lose their tension so that they may rub on the drum and thus wear out very fast. Start by removing the wheel lug nuts, lifting the rear of the car and placing it on jackstands and positioning the front wheels by tying them so that they do not move. Take off the rear wheels and free the parking brake. Secondly, take off the brake drum which must simply be pulled off on the hub; if difficult, use a gentle check with a soft-faced hammer or use bolts of 8 mm sizes in the tapped holes to force the brake drum off. If the drum stays lodged, pull back the shoes by unscrewing the rubber plug in the backing plate and with screwdrivers grasp the self-adjuster lever and turn the adjuster bolt with a view to releasing the drum. To ensure simple removal of the shoe, it is advisable to unscrew the rear wheel bearing cap, spindle nut, and washer so that one can slip of the hub unit. Where the inspection of all four rear brake shoes is necessary, follow the procedure with the advice of not to mix old and new brake shoes by performing the operation on one brake assembly only. Drum surface should be checked for cracks, score marks, deep scratches, and hard spots before the drum is reinstalled; any of these should be machined in an automotive machine shop. Resurfacing is advised for fighting the formation of out-of-round drums and if ever the drums are already too worn out, replacement is going to be necessary. If not re-coating, the glazing should be stripped off by using sandpaper or emery cloth. Later engage the hub and the bearing unit and also the washer with the new spindle nut being tightened with the desirable torque while engaging the brake drum. Place the wheel, screw the lug nuts, bring down the vehicle and finally, and normalize the lug nuts to the right torque. Then perform several forward and reverse stops to get the brakes set for satisfactory feel in the brake pedal, and check operation of brakes before going onto the traffic.


