×
- Hello
- Login or Register
- Quick Links
- Live Chat
- Track Order
- Parts Availability
- RMA
- Help Center
- Contact Us
- Shop for
- Honda Parts
- Honda Accessories

My Garage
My Account
Cart
Genuine Honda CRX Instrument Panel
- Select Vehicle by Model
- Select Vehicle by VIN
Select Vehicle by Model
orMake
Model
Year
Select Vehicle by VIN
For the most accurate results, select vehicle by your VIN (Vehicle Identification Number).
10 Instrument Panels found

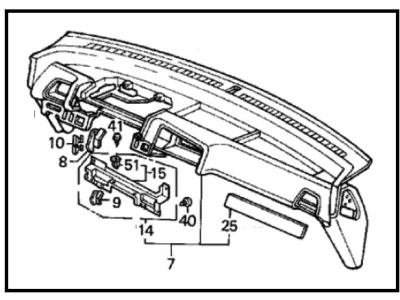
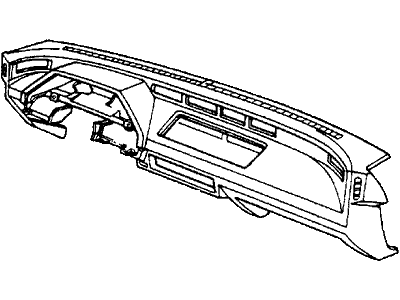
Honda CRX Panel Assy., Instrument *B44L* (PALMY BLUE)
Part Number: 77100-SH2-A12ZA$461.88 MSRP: $666.51Limited AvailabilityYou Save: $204.63 (31%)Honda CRX Panel Assy., Instrument *NH83L* (OFF BLACK)
Part Number: 77100-SH2-A11ZB$461.88 MSRP: $666.51Limited AvailabilityYou Save: $204.63 (31%)Honda CRX Panel Assy., Instrument *B44L* (PALMY BLUE)
Part Number: 77100-SH2-A11ZA$461.88 MSRP: $666.51You Save: $204.63 (31%)Honda CRX Panel Assy., Instrument *NH83L* (OFF BLACK)
Part Number: 77100-SH2-A10ZB$461.88 MSRP: $666.51You Save: $204.63 (31%)Honda CRX Panel Assy., Instrument *B44L* (PALMY BLUE)
Part Number: 77100-SH2-A10ZA$461.88 MSRP: $666.51You Save: $204.63 (31%)
Honda CRX Instrument Panel
In search of affordable OEM Honda CRX Instrument Panel? Consider browsing through our extensive inventory of genuine Honda CRX Instrument Panel. Not only do we provide market-leading prices and a manufacturer's warranty, but we also pride ourselves on exceptional customer service and swift delivery.
Honda CRX Instrument Panel Parts Questions & Experts Answers
- Q: How do you disconnect and reinstall the dashboard on Honda CRX?A:Disconnect the negative battery cable and remove the steering wheel, heater/defroster ducts, right and left side end caps, and on Civic Wagon models, the right and left defroster garnish, clock, and ashtray assembly. Take off the lower dashboard panel, disconnect the speedometer cable and ground wire, and remove the glove box assembly, including the tray under the dashboard for Wagon models. Remove the temperature control panel face plate and the radio if equipped, then take off the plastic covers from the dashboard mounting bolts and remove the bolts. Disconnect the harness connector from the main fuse box, then pull the dashboard back while lifting it slightly to release it from the guide pin at the center, ensuring it doesn't fall. For installation, position the dashboard inside the vehicle, align it with the guide pin, and ensure no wires are pinched, possibly enlisting an assistant. Install the mounting bolts in an alternating pattern, ensuring proper positioning and routing of cables, then install the bolt covers. Connect the fuse box plug, install the radio and heater face plate, and reassemble the glove box or lower tray assembly. Reconnect the speedometer cable and ground cable, install the lower dash panel, and reinstall the ashtray, clock, and ventilation ducts before attaching the steering wheel and reconnecting the negative battery cable. Finally, check all components for proper operation and listen for rattles while driving. For 1988-91 models, start by disconnecting the negative battery cable, sliding the seats back to remove the center console assembly, and taking off the fuse box lid and knee bolster. Disconnect connectors from the fuse box, which may require lowering it by removing two mounting nuts, and disconnect the ground cable at the right of the steering column along with the power mirror switch if equipped. Remove the knob from the driver's side air vent, take off the face plate, and unscrew the vent control lever. Remove the center panel, radio, heater control panel, and mounting panel, followed by the instrument cluster assembly. Take off the plastic cover from the center of the dashboard near the windshield and the side window defroster garnish panel at both ends. Remove the steering column mounting bolts and lower the column, then take out the dashboard retaining bolts located at each end, the upper center, lower center, glove box area, and under the lower left side. Lift and remove the dashboard from the firewall, pulling it out through the door while ensuring all wires are disconnected. For installation, place the dashboard in position inside the vehicle, lift it towards the firewall, and ensure no wires or cables are pinched before installing and tightening the mounting bolts in an alternating pattern to center the dashboard properly. Raise the steering column into position, install the radio and heater control panel, reconnect the fuse box and wires if it was lowered, and install the remaining trim components and instrument cluster. Finally, attach the steering wheel and center console, reconnect the negative battery cable, and check the operation of all components while listening for squeaks and rattles during driving.


