×
- Live Chat
- 1-888-984-2011

My Garage
My Account
Cart
Genuine Honda Crosstour Intake Manifold
Engine Intake Manifold- Select Vehicle by Model
- Select Vehicle by VIN
Select Vehicle by Model
orHonda
Crosstour
Year
Select Vehicle by VIN
For the most accurate results, select vehicle by your VIN (Vehicle Identification Number).
3 Intake Manifolds found
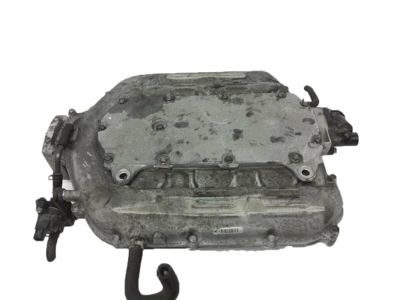
Honda Crosstour Mnfld Complete, In
Part Number: 17160-5G0-A00$562.84 MSRP: $812.18You Save: $249.34 (31%)Honda Crosstour Manifold, Intake
Part Number: 17100-R40-A00$222.43 MSRP: $316.85You Save: $94.42 (30%)Honda Crosstour Manifold, Intake
Part Number: 17160-RN0-A00$340.49 MSRP: $479.05You Save: $138.56 (29%)
Honda Crosstour Intake Manifold
Intake Manifold of Honda Crosstour is a vital component responsible for the distribution of air or the mixed air/fuel to individual cylinder, which makes a very important contribution to the performance as well as power of the engine. It is intended to produce a proper flow of fresh air through the use of various technologies such as the variable- length intake manifolds (VLIM) which change the much intake tract in relation to the load of the engine. Earlier models of Honda Crosstour intake manifolds were made of aluminum or cast iron, while the current crop of cars all them use lightweight composite plastics. This change benefits both fuel economy and the cooler air that is required to create the proper combustion. There is also a provision of sensors in the intake manifold and this helps in monitoring the temperatures and flows in the intake manifold, thus helping to optimize performance of the engine.
In search of affordable OEM Honda Crosstour Intake Manifold? Consider browsing through our extensive inventory of genuine Honda Crosstour Intake Manifold. Not only do we provide market-leading prices and a manufacturer's warranty, but we also pride ourselves on exceptional customer service and swift delivery.
Honda Crosstour Intake Manifold Parts Questions & Experts Answers
- Q: What are the steps involved in removing and installing the intake manifold and injector base on Four cylinder engine on Honda Crosstour?A: The intake manifold consists of two pieces, the outer portion, known as the intake manifold, and the inner portion, referred to as the injector base. To begin removal, relieve the fuel system pressure if the injector base will also be removed; otherwise, this step can be skipped. Disconnect the cable from the negative terminal of the battery. If the injector base is to be removed, drain the engine coolant. Next, remove the intake manifold cover and the intake duct between the throttle body and the air filter housing. Disconnect the accelerator cable and, if applicable, the cruise control cable from the throttle body, positioning them off to the side. Clamp off the coolant hoses attached to the throttle body and detach them, being prepared for some coolant spillage. Remove the splash shield from below the engine compartment, disconnect the wiring harness clamps, and position the harness aside. Remove the intake manifold brace and disconnect the power brake booster vacuum hose from the intake manifold, along with the EVAP hose from the throttle body. For models with an automatic transaxle, also remove the small vacuum hose from the rear side of the intake manifold. Disconnect the IAC valve, TPS, and any other electrical connectors that may obstruct manifold removal, then remove the bolt and detach the wiring harness from the front of the manifold. Remove the intake manifold mounting bolts and nuts, then separate the intake manifold from the injector base. Detach the PCV hose from the pipe on top of the injector base, remove the fuel rail and injectors, and detach the coolant hose from the pipe on the underside of the injector base. Finally, remove the injector base mounting bolts and nuts to detach it from the Cylinder Head. For installation, reverse the removal steps while ensuring to clean away all traces of old gasket material, install new gaskets, and tighten the fasteners to the specified torque, starting with the center bolts and working towards the ends. If the injector base was removed, refill the cooling system; if only the intake manifold was removed, check and adjust the coolant level as necessary. After reconnecting the accelerator and cruise control cables, adjust them if needed, reconnect the battery, and run the engine to check for leaks.


