Contact Us Live Chat or 1-888-984-2011
My Garage
My Account
Cart
Make sure this part fits

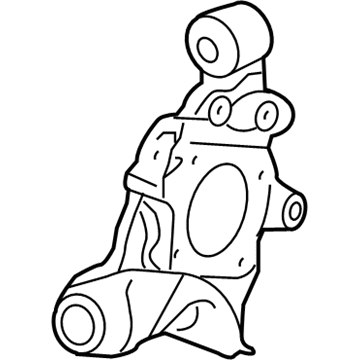
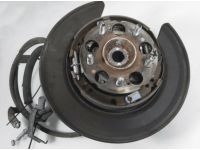
Honda 52210-T0A-A00 Knuckle Complete, Right Rear

2012-2014 Honda CR-V 52210T0AA00

Customer Questions & Expert Answers (3)
Honda 52210-T0A-A00 Knuckle Complete, Right Rear
  • Part Description
    Knuckle
  • Position
    Rear Passenger Side
  • Manufacturer
    Honda
Make sure this part fits
$183.19 MSRP: $260.95
You Save: $77.76 (30%)
1
ADD TO CART
  • Related Parts
  • Product Specifications
  • Vehicle Fitment
  • Customer Questions & Expert Answers
  • Product Specifications

    BrandGenuine Honda
    Manufacturer Part Number52210-T0A-A00
    Part DescriptionKnuckle
    Item Dimensions13.0 x 12.8 x 9.5 inches
    Item Weight9.10 Pounds
    PositionRear Passenger Side
    ConditionNew
    Fitment TypeDirect Replacement
    ManufacturerHonda
    SKU52210-T0A-A00
    WarrantyThis genuine Honda part is guaranteed by Honda's factory warranty.
    Shipping & ReturnShipping Policy Return Policy
    Warning: California’s Proposition 65
  • Vehicle Fitment

    Year Make Model Body & Trim Emission & Transmission
    2014 Honda CR-V5 Door EX (AWD), 5 Door EX-L (AWD), 5 Door LX (AWD)KA 5AT
    2013 Honda CR-V5 Door EX (AWD), 5 Door EX-L (AWD), 5 Door LX (AWD)KA 5AT
    2012 Honda CR-V5 Door EX (AWD), 5 Door EX-L (AWD), 5 Door LX (AWD)KA 5AT
  • Customer Questions & Expert Answers

    Q:
    Will this part fit my vehicle? Posted by HondaPartsNow Specialist
    A:
    You can Select Your Vehicle to check if 52210-T0A-A00 fits your vehicle.
    Posted by HondaPartsNow Specialist
    Q:
    How Do You remove a rear Trailing Arm and Steering Knuckle on Honda CR-V? Posted by Customer
    A:
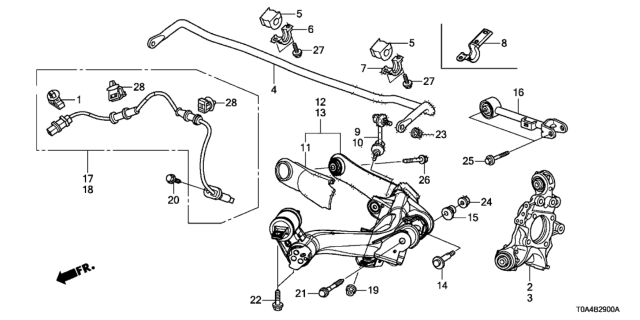
    Loosen the rear wheel lug nuts, raise the rear of the vehicle, support it on jackstands, and block the front wheels. Remove the wheel. If working on a CR-V, detach the ABS wheel speed sensor harness bracket from the upper arm. Support the trailing arm with a floor jack. Remove the upper arm-to-knuckle bolt and the inner end bolt(s) of the arm. For installation, reverse the removal process, ensuring the trailing arm is raised with the floor jack to simulate normal ride height before fully tightening the fasteners. Tighten all fasteners and the wheel lug nuts. Support the trailing arm again and unbolt the brake hose and ABS sensor mounting brackets. Remove the rear undercarriage splash shield if applicable. Mark the relationship of the toe adjusting cam on the trailing arm-to-knuckle bolt. Remove the lower shock absorber bolt and the trailing arm-to-knuckle bolts. Suspend the knuckle with a cord or wire. Disconnect the stabilizer bar link from the trailing arm. If working on a Civic, remove the shock absorber lower mounting bolt, trailing arm-to-chassis front mounting bolts, and slowly lower the jack to remove the coil spring. Remove the trailing arm-to-chassis pivot bolt and the trailing arm. Installation involves aligning marks on the adjuster cam and the trailing arm, raising the trailing arm to simulate ride height, and tightening fasteners to the right torque specifications. Check and adjust the rear wheel alignment if necessary. If working on an AWD CR-V, remove the drive axle/hub nut. Remove the brake drum or brake caliper and disc. Remove parking brake shoes, wheel speed sensor, and parking brake cable. Disconnect the trailing arm from the knuckle after supporting the trailing arm and remove the rear wheel bearing hub assembly. On drum brake models, remove the brake backing plate with brake shoes attached. Remove the fasteners connecting the knuckle to the upper arm and trailing arm, marking the cam bolt position. Installation involves raising the trailing arm to simulate ride height, aligning matchmarks on the toe adjusting cam, tightening all fasteners to the proper specifications, and ensuring the caliper mounting bolts are tightened correctly. It's not necessary to bleed the brakes unless a hydraulic fitting was loosened. Check and adjust rear wheel alignment if required.
    Posted by HondaPartsNow Specialist
    Q:
    What should I do after completing the installation from the 2012 Honda CR-V? Posted by Customer
    A:
    After the installation is complete, have the front wheel alignment checked and, if necessary, adjusted.
    Posted by HondaPartsNow Specialist
    See expert answers on similar Steering Knuckle
    If you have any questions about this product, please don't hesitate to ask us. We will be happy to help you!

Genuine Honda Part 52210-T0A-A00, the Right Choice

To ensure reliability, purchase Honda part # 52210-T0A-A00 Knuckle Complete, Right Rear. It is sometimes referred to as Honda Steering Knuckle. In terms of quality, OEM parts are the wise choice for Honda owners who want to keep their vehicles at peak performance. They are manufactured to follow official strict factory specifications and are made in world-class facilities. They undergo rigorous tests to ensure that they are durable and safe to use. This part fits 2012-2014 Honda CR-V.

HondaPartsNow.com is a leading supplier of genuine Honda parts and accessories such as Honda 52210T0AA00 Knuckle Complete, Right Rear. When it comes to choosing the right parts for your vehicle, the solution is simple: shop from our wide selection of genuine Honda parts at competitive prices available on HondaPartsNow.com. We prioritize your convenience, 100% satisfaction, and peace of mind by offering a user-friendly catalog, manufacturer-warranted OEM Honda parts, a hassle-free return policy, and swift delivery service.

Why choose Honda Parts Now

  • Dedicated Service

    Your complete satisfaction is our #1 goal

  • Lowest Prices

    Best deals on genuine OE parts from dealerships

  • Fast Delivery

    Orders are processed and delivered promptly