×
- Hello
- Login or Register
- Quick Links
- Live Chat
- Track Order
- Parts Availability
- RMA
- Help Center
- Contact Us
- Shop for
- Honda Parts
- Honda Accessories

My Garage
My Account
Cart
Genuine Honda Odyssey Tie Rod End
Steering Rod End- Select Vehicle by Model
- Select Vehicle by VIN
Select Vehicle by Model
orMake
Model
Year
Select Vehicle by VIN
For the most accurate results, select vehicle by your VIN (Vehicle Identification Number).
12 Tie Rod Ends found


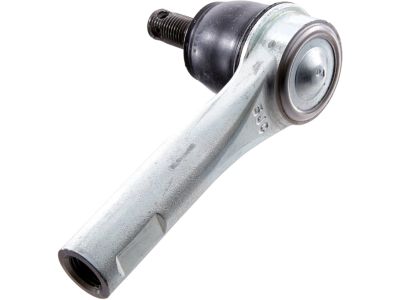
Honda Odyssey End, Driver Side Tie Rod
Part Number: 53560-THR-A02$29.65 MSRP: $41.88You Save: $12.23 (30%)
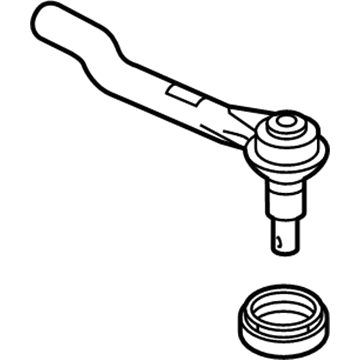
Honda Odyssey End, Passenger Side Tie Rod
Part Number: 53540-THR-A02$31.77 MSRP: $44.87You Save: $13.10 (30%)


Honda Odyssey End, Driver Side Tie Rod
Part Number: 53560-SX0-013$29.57 MSRP: $60.55You Save: $30.98 (52%)Honda Odyssey End, Passenger Side Tie Rod
Part Number: 53540-SX0-003$52.30 MSRP: $73.86You Save: $21.56 (30%)Honda Odyssey End, Driver Side Tie Rod
Part Number: 53560-SX0-003$46.67 MSRP: $65.90You Save: $19.23 (30%)


Honda Odyssey Tie Rod End
Tie Rod End is another important component that is used in steering system of Honda Odyssey vehicles, its general function is to connect the steering rack to the steering knuckles. This link is crucial to help to control the steadiness of the automobile and the capacity to select the correct path of the car's movement. The Tie Rod End consists of two components: two components of which include the inner tie rod end which holds the outer tie rod end in place thus enabling free movement of the two. While there might have been different designs for Tie Rod End applied to different models of Honda Odyssey in the course of the years, information regarding different variations is not provided. The primary function of this type also remains the same across them and that is to guarantee dependable steering performance and vehicle dynamics. In general, the Tie Rod End is a crucial component that sustains the Honda Odyssey and honed the ride quality and feeling.
In search of affordable OEM Honda Odyssey Tie Rod End? Consider browsing through our extensive inventory of genuine Honda Odyssey Tie Rod End. Not only do we provide market-leading prices and a manufacturer's warranty, but we also pride ourselves on exceptional customer service and swift delivery.
Honda Odyssey Tie Rod End Parts Questions & Experts Answers
- Q: How do you properly replace a tie-rod end on Honda Odyssey?A:Lose the wheel lug nuts, lift the front of the vehicle, and securely mount the vehicle on jack stands applying the parking brake and placing blocks on the rear wheels. Take off the wheel and unbolt the tie-rod end examine the camber and bushing; you will use a back-up wrench in order to avoid the turning of the tie-rod. Connect the threads of the jam nut to the tie-rod end, this makes sure that the toe-in setting is as were fixed before, then loosen the nut until the marks you made are seen on it. Take out the cotter pin and unscrew the nut of the tie-rod end ballstud several turns before using the two jaw puller and disconnecting the tie-rod from the steering knuckle arm. Finally, take out the nut from the ball stud and pull the tie rod end apart from the steering knuckle and then turn it anti clockwise to be unbolted from the tie rod. For installation, slide the tie-rod end over the tie-rod until it reaches the marked position and link it to the steering arm while tightening the nut on the ballstud to an appropriate torque while a new cotter pin should be assembled. If necessary, turn the nut slightly tighter so that it is clean for the engagement of the cotter pin but should not be loosened for that purpose. Safely torque up the jam nut, fit the wheel, lift off the vehicle, and torque the lugs to the required level. Last but not the least, one has to check the front end alignment and if necessary get it aligned.
Related Honda Odyssey Parts
Browse by Year
2024 Tie Rod End 2023 Tie Rod End 2022 Tie Rod End 2021 Tie Rod End 2020 Tie Rod End 2019 Tie Rod End 2018 Tie Rod End 2017 Tie Rod End 2016 Tie Rod End 2015 Tie Rod End 2014 Tie Rod End 2013 Tie Rod End 2012 Tie Rod End 2011 Tie Rod End 2010 Tie Rod End 2009 Tie Rod End 2008 Tie Rod End 2007 Tie Rod End 2006 Tie Rod End 2005 Tie Rod End 2004 Tie Rod End 2003 Tie Rod End 2002 Tie Rod End 2001 Tie Rod End 2000 Tie Rod End 1999 Tie Rod End 1998 Tie Rod End 1997 Tie Rod End 1996 Tie Rod End 1995 Tie Rod End


