×
- Live Chat
- 1-888-984-2011

My Garage
My Account
Cart
Genuine Honda Odyssey Steering Knuckle
Front Steering Knuckle- Select Vehicle by Model
- Select Vehicle by VIN
Select Vehicle by Model
orMake
Model
Year
Select Vehicle by VIN
For the most accurate results, select vehicle by your VIN (Vehicle Identification Number).
23 Steering Knuckles found
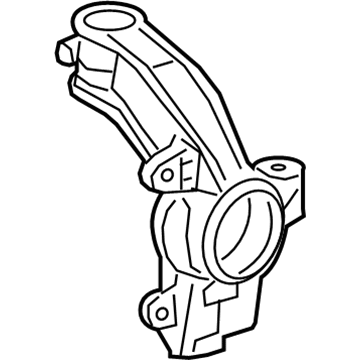
Honda Odyssey Knuckle, Right Front
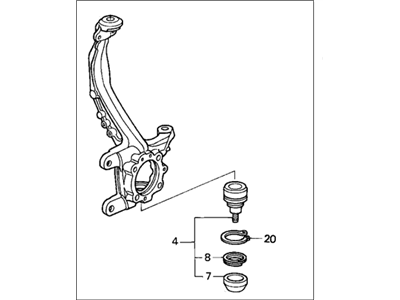
Part Number: 51211-S0X-A01$300.63 MSRP: $428.25You Save: $127.62 (30%)Honda Odyssey Knuckle, Left Front
Part Number: 51216-SHJ-A01$511.99 MSRP: $738.80You Save: $226.81 (31%)Honda Odyssey Knuckle, Right Front
Part Number: 51211-SHJ-A01$511.99 MSRP: $738.80You Save: $226.81 (31%)Honda Odyssey Knuckle, Left Rear
Part Number: 52215-THR-A01$203.28 MSRP: $289.57You Save: $86.29 (30%)Honda Odyssey Knuckle, Right Rear
Part Number: 52210-SHJ-A00$295.57 MSRP: $421.03You Save: $125.46 (30%)Honda Odyssey Knuckle, Left Rear
Part Number: 52215-SHJ-A00$295.57 MSRP: $421.03You Save: $125.46 (30%)Honda Odyssey Knuckle, Left Front
Part Number: 51216-THR-A01$230.92 MSRP: $328.95You Save: $98.03 (30%)Honda Odyssey Knuckle, Right Front
Part Number: 51211-THR-A01$230.92 MSRP: $328.95You Save: $98.03 (30%)Honda Odyssey Knuckle, Front Left
Part Number: 51216-TK8-D00$502.79 MSRP: $725.53You Save: $222.74 (31%)Honda Odyssey Knuckle, Right Rear
Part Number: 52210-TK8-A01$237.23 MSRP: $337.93You Save: $100.70 (30%)Honda Odyssey Knuckle, Left Rear
Part Number: 52215-S0X-A10$195.92 MSRP: $401.28You Save: $205.36 (52%)Honda Odyssey Knuckle, Left Rear
Part Number: 52215-TK8-A01$237.23 MSRP: $337.93You Save: $100.70 (30%)Honda Odyssey Knuckle, Right Rear
Part Number: 52210-THR-A01$203.28 MSRP: $289.57You Save: $86.29 (30%)Honda Odyssey Knuckle, Front Right
Part Number: 51211-TK8-D00$520.08 MSRP: $750.48You Save: $230.40 (31%)
| Page 1 of 2 |Next >
1-20 of 23 Results
Honda Odyssey Steering Knuckle
This is because The Steering Knuckle found in Honda Odyssey automobiles is part that attaches the suspension to the steering and to the front wheels. It also offers connection points for the control arm, the tie rod end and the spindle or the hub and can move up and down in relation to the road's surface as well as moving sideward during steering. The Steering Knuckles used by Honda Odyssey over the years have included several styles as categorized by drive used which is front-wheel, all-wheel, or four-wheel. These Steering Knuckles may include a hub or spindle whereby the hub entails the contact point for the drive mechanism while the spindle entailing free rotation of the wheel assembly. The design variation helps to reduce and manage dynamics that are critical to the operation of the Honda Odyssey. It is important to perform periodical inspection of the Steering Knuckle and its constituent components for the sake of effective vehicle operation and safety.
In search of affordable OEM Honda Odyssey Steering Knuckle? Consider browsing through our extensive inventory of genuine Honda Odyssey Steering Knuckle. Not only do we provide market-leading prices and a manufacturer's warranty, but we also pride ourselves on exceptional customer service and swift delivery.
Honda Odyssey Steering Knuckle Parts Questions & Experts Answers
- Q: How do you remove and install the steering knuckle and driveaxle on Honda Odyssey?A: Before pulling out the components, one has to loosen the drive-axleh / hub-nut and the lug nuts of the wheel, then one has to lift the car and place it on jack stands before removing the wheel. Secondly, unbolt and suspend the brake caliper, thirdly disassemble the caliper support, fourthly, and remove the brake disc from the nave. Remove the brake hose clamp, and the wheel speed sensor from the knuckle. Locate the strut to the steering knuckle; now you twist the strut-to-steering knuckle bolts slightly but don't disconnect them. Disconnect the tie-rod from the steering knuckle arm then loosen the nut joining the ball joint and the steering knuckle then you separate them and take the nut. Give the boss a few hits with a hammer on the steering knuckle until it is loose and can be unlatched from the balljoint stud to remove the strut to knuckle bolts. Locate the driveaxle and push it from the hub and before fully removing the steering knuckle from the strut, use wire to support the end of the driveaxle. For installation, align the knuckle and hub assembly and the insert the driveaxle into the hub that should be placed in the knuckle properly. Screw the bolts and nuts in the strut flange up to the knuckle without use of any additional force yet. Ask the subject to fix the now balljoint to the Control Arm and fit the nut, but do not screw it. Fix the tie rod to the steering knuckle arm and finally the strut bolts nuts, balljoint-to-control arm nut and tie-rod nut to the specified torque. Position the brake disc on the hub and fit the mounting bracket of the caliper as well as the caliper. The driveaxle/hub nut is installed, however it is not tightened to the final torque until the vehicle is lowered and it recommended that these fasteners are replaced with new nuts at this stage. Finally fit the wheel and the lug nuts, gradually lower the vehicle and then torque the lug nuts as well as the driveaxle/hub nut. Front for wheel alignment should also be run and realigned if they are found to be misaligned.
Related Honda Odyssey Parts
Browse by Year
2024 Steering Knuckle 2023 Steering Knuckle 2022 Steering Knuckle 2021 Steering Knuckle 2020 Steering Knuckle 2019 Steering Knuckle 2018 Steering Knuckle 2017 Steering Knuckle 2016 Steering Knuckle 2015 Steering Knuckle 2014 Steering Knuckle 2013 Steering Knuckle 2012 Steering Knuckle 2011 Steering Knuckle 2010 Steering Knuckle 2009 Steering Knuckle 2008 Steering Knuckle 2007 Steering Knuckle 2006 Steering Knuckle 2005 Steering Knuckle 2004 Steering Knuckle 2003 Steering Knuckle 2002 Steering Knuckle 2001 Steering Knuckle 2000 Steering Knuckle 1999 Steering Knuckle 1998 Steering Knuckle 1997 Steering Knuckle 1996 Steering Knuckle 1995 Steering Knuckle


