×
- Live Chat
- 1-888-984-2011

My Garage
My Account
Cart
Genuine Honda Odyssey Parking Brake Shoe
Emergency Parking Brake Shoe- Select Vehicle by Model
- Select Vehicle by VIN
Select Vehicle by Model
orMake
Model
Year
Select Vehicle by VIN
For the most accurate results, select vehicle by your VIN (Vehicle Identification Number).
8 Parking Brake Shoes found
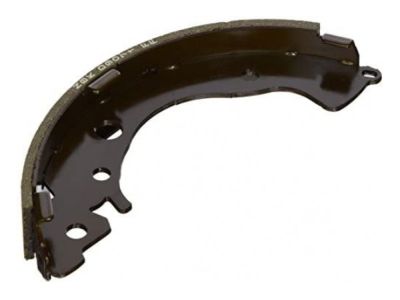
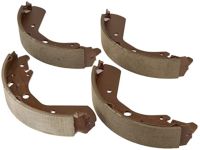
Honda Odyssey Shoe Set, Rear Brake
Part Number: 43053-S0X-010$157.95 MSRP: $225.00You Save: $67.05 (30%)Honda Odyssey Shoe Set, Rear Brake
Part Number: 43053-S0X-000$157.95 MSRP: $225.00You Save: $67.05 (30%)Honda Odyssey Shoe B, Driver Side Parking Brake
Part Number: 43155-S0X-A02$35.87 MSRP: $50.67You Save: $14.80 (30%)
Honda Odyssey Parking Brake Shoe
In Honda Odyssey vehicles, the Parking Brake Shoe plays an important role of locking the wheels in order to ensure that the car does not move when parked. This is made possible through brake lining that rubs on the drum wall and produces friction which halts the movement of wheels when parking brakes are applied. The Honda Odyssey by this date may have had different designs and styles of the Parking Brake Shoe though these design differences are not elaborated. The primary mechanism remains comparable in these models with accentuating on effective wheel immobilization. In this page, the author will concentrate in expounding on the workings of the automobile component called the Parking Brake Shoe so as to enable the corrected use of the Honda Odyssey.
In search of affordable OEM Honda Odyssey Parking Brake Shoe? Consider browsing through our extensive inventory of genuine Honda Odyssey Parking Brake Shoe. Not only do we provide market-leading prices and a manufacturer's warranty, but we also pride ourselves on exceptional customer service and swift delivery.
Honda Odyssey Parking Brake Shoe Parts Questions & Experts Answers
- Q: How should you properly replace brake shoes and Parking Brake Shoe on Honda Odyssey?A: If the brake shoes are to be replaced, the return and hold-down springs should also be replaced seeing that they undergo a normal heating and cooling cycle that makes them to lose tension and hence results to faster wear of shoes. Starting with the wheel lug nuts, the rear of the car shall be raised, and support it using the jack stands while the front wheels are blocked. Lift the car and undo the parking break, and take off the wheel. Replacement of the four rear brake shoes should be at once, however to avoid cross tracing of parts, work on one brake assembly only. Take off the brake drum, there should be only one, if it cannot be removed pull the brake shoes in by turning the adjuster star wheel which can be seen after removing the brake drum. Remove the brake shoes from the brake drum and clean the brake shoe assembly using the brake system cleaner not compressed air. As a rule, brake shoes are replaced according to the illustrations for this operation, while the contact surfaces must be lubricated with high-temperature grease, and the shoes-fixed with hold-down clips. Before refitting revolve the drum and see if there are any signs of wear on the surface if there is, it should be done over. Fit the brake drum and snug up the brake shoes until they come in contact with the brake drum and then re-fix the plug. Put the wheel back on, bring down the car and tighten the nuts as required. Make forward and reverse stops, operate the parking brake, and inspect the brakes to ensure that they performed satisfactorily. The same procedure can be applied for the models equipped with the rear disk brakes and will include cleaning the parking brake shoes, removing and installing the springs and clips, grease the contact surfaces of the brake lining and assemble the calipers and the disk. Last of all, make sure you adjust the shoes of the shoes and check on the functionality of the brakes before operating the vehicle.
Related Honda Odyssey Parts
Browse by Year
2017 Parking Brake Shoe 2016 Parking Brake Shoe 2015 Parking Brake Shoe 2014 Parking Brake Shoe 2013 Parking Brake Shoe 2012 Parking Brake Shoe 2011 Parking Brake Shoe 2010 Parking Brake Shoe 2009 Parking Brake Shoe 2008 Parking Brake Shoe 2007 Parking Brake Shoe 2006 Parking Brake Shoe 2005 Parking Brake Shoe 2004 Parking Brake Shoe 2003 Parking Brake Shoe 2002 Parking Brake Shoe 2001 Parking Brake Shoe 2000 Parking Brake Shoe 1999 Parking Brake Shoe 1998 Parking Brake Shoe 1997 Parking Brake Shoe 1996 Parking Brake Shoe 1995 Parking Brake Shoe


