×
- Hello
- Login or Register
- Quick Links
- Live Chat
- Track Order
- Parts Availability
- RMA
- Help Center
- Contact Us
- Shop for
- Honda Parts
- Honda Accessories

My Garage
My Account
Cart
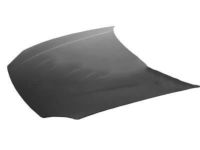
Genuine Honda Del Sol Hood
Engine Hood- Select Vehicle by Model
- Select Vehicle by VIN
Select Vehicle by Model
orMake
Model
Year
Select Vehicle by VIN
For the most accurate results, select vehicle by your VIN (Vehicle Identification Number).
2 Hoods found
Honda Del Sol Hood
In search of affordable OEM Honda Del Sol Hood? Consider browsing through our extensive inventory of genuine Honda Del Sol Hood. Not only do we provide market-leading prices and a manufacturer's warranty, but we also pride ourselves on exceptional customer service and swift delivery.
Honda Del Sol Hood Parts Questions & Experts Answers
- Q: How do you remove and install a hood safely and effectively on Honda Del Sol?A:To remove and install the hood it is recommended to have at least two people as it is rather heavy and bulky. The first step is to start with the fenders and the cowl region for it can be covered with blankets and pads to avoid scratching the body and the paint. It is also necessary to scribe or draw alignment marks around the bolt heads with a view of enhancing their alignment on installation. Any cables or wire harnesses that might come within the vicinity of the component to be removed should be disconnected. With an assistant supporting the hood's weight, remove those bolts that connect the hinge to the hood and shims if any on both sides, so they don't get mixed up. Remove the hood and for the purpose of installation, perform the steps in the reverse order, as the hinges are fitted in the locations indicated by scribe lines the shims should be refitted at their previous positions to check the alignment. Slide the hood forward or backward in relation to the front of the car depending on the need-this is done by turning the elongated holes in the hinges by scribing a line round the hinge plate, and loosening the bolts and making minor changes before tightening them up. The Hood Latch assembly can also be slid to and fro to ensure it is closed tightly and at par with the marked fenders after unlatching it to adjust it further. Last but not the least, fine tune the vertical height of the front edge of the hood with the help of the edge cushions and spacers, in case required, and at certain intervals, grease the hood latch assembly and the hinges with white lithium grease to avoid sticking and other related issues.


