×
- Hello
- Login or Register
- Quick Links
- Live Chat
- Track Order
- Parts Availability
- RMA
- Help Center
- Contact Us
- Shop for
- Honda Parts
- Honda Accessories

My Garage
My Account
Cart
Genuine Honda CRX Seat Belt
Seat Safety Belt- Select Vehicle by Model
- Select Vehicle by VIN
Select Vehicle by Model
orMake
Model
Year
Select Vehicle by VIN
For the most accurate results, select vehicle by your VIN (Vehicle Identification Number).
27 Seat Belts found
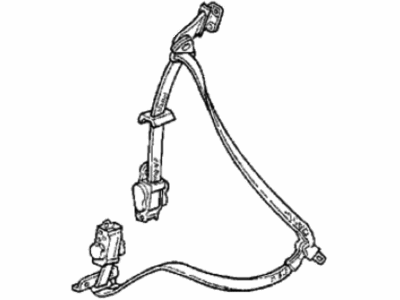
Honda CRX Seat Belt Assy., L. FR. *NH1L*(Takata) (BLACK)
Part Number: 776A2-SB2-Z02ZC$391.19 MSRP: $564.48You Save: $173.29 (31%)Honda CRX Outer Set, Right Front Seat Belt (Graphite Black)
Part Number: 04814-SH2-A33ZC$1689.70 MSRP: $2438.23You Save: $748.53 (31%)Honda CRX Seat Belt Assy., R. FR. *B49L*(Nippon Seiko) (FAIR BLUE)
Part Number: 776A1-SB2-677ZA$271.04 MSRP: $386.11You Save: $115.07 (30%)Honda CRX Seat Belt Assy., R. FR. *NH83L* (Nippon Seiko) (OFF BLACK)
Part Number: 776A1-SB2-677ZB$271.04 MSRP: $386.11You Save: $115.07 (30%)Honda CRX Seat Belt Assembly, Right Front (Fair Blue) (Takata)
Part Number: 776A1-SB2-678ZA$271.04 MSRP: $386.11You Save: $115.07 (30%)Honda CRX Seat Belt Assy., R. FR. *NH83L* (Takata) (OFF BLACK)
Part Number: 776A1-SB2-678ZB$271.04 MSRP: $386.11You Save: $115.07 (30%)Honda CRX Seat Belt Assy., R. FR. *NH83L* (Nippon Seiko) (OFF BLACK)
Part Number: 776A1-SB2-A01ZB$271.04 MSRP: $386.11You Save: $115.07 (30%)Honda CRX Seat Belt Assy., R. FR. *NH83L* (Takata) (OFF BLACK)
Part Number: 776A1-SB2-A02ZB$271.04 MSRP: $386.11You Save: $115.07 (30%)Honda CRX Seat Belt Assy., L. FR. *NH1L*(Nippon Seiko) (BLACK)
Part Number: 776A2-SB2-673ZA$271.04 MSRP: $386.11You Save: $115.07 (30%)Honda CRX Seat Belt Assy., L. FR. *B32L*(Takata) (DEW BLUE)
Part Number: 776A2-SB2-674ZB$271.04 MSRP: $386.11You Save: $115.07 (30%)Honda CRX Seat Belt Assy., L. FR. *B32L*(Nippon Seiko) (DEW BLUE)
Part Number: 776A2-SB2-675ZB$271.04 MSRP: $386.11You Save: $115.07 (30%)Honda CRX Seat Belt Assy., L. FR. *B32L*(Takata) (DEW BLUE)
Part Number: 776A2-SB2-676ZB$271.04 MSRP: $386.11You Save: $115.07 (30%)Honda CRX Seat Belt Assy., L. FR. *B49L*(Nippon Seiko) (FAIR BLUE)
Part Number: 776A2-SB2-677ZA$271.04 MSRP: $386.11You Save: $115.07 (30%)Honda CRX Seat Belt Assembly, Left Front (Fair Blue) (Takata)
Part Number: 776A2-SB2-678ZA$271.04 MSRP: $386.11You Save: $115.07 (30%)Honda CRX Seat Belt Assy., L. FR. *NH83L* (Nippon Seiko) (OFF BLACK)
Part Number: 776A2-SB2-A01ZB$271.04 MSRP: $386.11You Save: $115.07 (30%)Honda CRX Seat Belt Assy., L. FR. *NH83L* (Takata) (OFF BLACK)
Part Number: 776A2-SB2-A02ZB$271.04 MSRP: $386.11You Save: $115.07 (30%)Honda CRX Seat Belt Assy., L. FR. *B49L*(Nippon Seiko) (FAIR BLUE)
Part Number: 776A2-SB2-Z01ZE$271.04 MSRP: $386.11You Save: $115.07 (30%)
| Page 1 of 2 |Next >
1-20 of 27 Results
Honda CRX Seat Belt
In search of affordable OEM Honda CRX Seat Belt? Consider browsing through our extensive inventory of genuine Honda CRX Seat Belt. Not only do we provide market-leading prices and a manufacturer's warranty, but we also pride ourselves on exceptional customer service and swift delivery.
Honda CRX Seat Belt Parts Questions & Experts Answers
- Q: What are the differences in seat belt systems, and how do you install a 3-point seat belt on Honda CRX?A:All late models are equipped with a front and rear 3-point seat belt system, while early models only have lap belts in the rear. Late model sedans also feature a power shoulder belt assembly. The 1989-91 Civic hatchback and CRX come with a 3-point belt system with components located in the door. For standard 3-point belts, except for the 1989-91 Civic hatchback and CRX, begin by removing the center door trim panel on sedan models or the quarter trim panel on hatchback models. Next, take out the upper and lower seat belt anchor bolts, followed by the retractor mounting bolts, and then remove the belt assembly from the vehicle. The center belt latch can be removed by sliding the seat forward and taking out the mounting bolt. Install the belt in position, ensuring to tighten the upper and lower anchor bolts and the retractor bolt to 23 ft. lbs. (32 Nm). After that, install the center latch assembly and bolt, tightening it to the same torque. Finally, reinstall the trim panels, ensuring the belt retracts properly. For the 1988-91 Civic hatchback and CRX, start by removing the Door Panel assembly, followed by the shoulder belt studs and bracket, the belt guide bolt and guide, and the nuts retaining the lap belt bracket. Remove the nuts retaining the emergency locking retractor and take out the assembly. The seat must be removed to access the center latch assembly. Reinstall the assembly in reverse order, tightening the retractor assembly bolts to 23 ft. lbs. (32 Nm), and replace the shoulder belt studs, tightening them to the same torque using a T40 Torx bit. Finally, install the door panel assembly and check that the seat belt operates properly.


