×
- Live Chat
- 1-888-984-2011

My Garage
My Account
Cart
Genuine Honda Crosstour Tailgate Latch
Rear Tailgate Latch- Select Vehicle by Model
- Select Vehicle by VIN
Select Vehicle by Model
orMake
Model
Year
Select Vehicle by VIN
For the most accurate results, select vehicle by your VIN (Vehicle Identification Number).
1 Tailgate Latch found
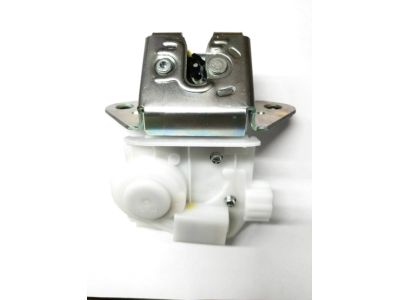
Honda Crosstour Lock Assembly, Tailgate
Part Number: 74800-TP6-A02$75.05 MSRP: $106.00You Save: $30.95 (30%)
Honda Crosstour Tailgate Latch
In search of affordable OEM Honda Crosstour Tailgate Latch? Consider browsing through our extensive inventory of genuine Honda Crosstour Tailgate Latch. Not only do we provide market-leading prices and a manufacturer's warranty, but we also pride ourselves on exceptional customer service and swift delivery.
Honda Crosstour Tailgate Latch Parts Questions & Experts Answers
- Q: How to remove and install Tailgate Latch and Tailgate Lift Support on Honda Crosstour?A: To address the tailgate latch, if the outer handle switch fails to open it, start by removing the inside maintenance lid, then turn the emergency lever clockwise on the lower trim panel of the tailgate. Next, remove the lower tailgate trim, disconnect the actuator/latch switch connector, and take out the bolts securing the latch before pulling it out. For the tailgate strut supports, ensure two people are involved due to the weight of the tailgate; pry the strut support clips from each end, release the strut support from the pivot studs, and reinstall in reverse order. For tailgate adjustment, first remove the two support struts and the cap from the striker, then slightly loosen the hinge bolts and striker mounting screws. Adjust the tailgate left or right using the elongated holes in the hinges for an even gap, turn the edge cushions for a flush fit, center the striker in the latch, securely tighten the hinge bolts, reconnect the support struts, and reinstall the striker cap. To replace the tailgate dynamic damper, remove the middle trim, release the tabs and hooks, take out the damper bolts, and remove the damper, reinstalling in reverse order. For the liftgate outer handle/switch, remove the trim panel, disconnect the electrical connector, take out the mounting nuts, and pull the handle from the liftgate, reinstalling in reverse order. For the liftgate trim panels, use a trim tool to release fasteners around the middle panel, remove screw covers and screws along the window glass trim, release fasteners around the upper panel, pry out trim caps from the inner pull handle to remove the mounting bolts and handle, and finally, work around the lower panel perimeter to release fasteners and remove it, reinstalling in reverse order.


