×
- Live Chat
- 1-888-984-2011

My Garage
My Account
Cart
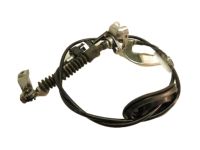
Genuine Honda Crosstour Shift Cable
Transmission Shift Cable- Select Vehicle by Model
- Select Vehicle by VIN
Select Vehicle by Model
orMake
Model
Year
Select Vehicle by VIN
For the most accurate results, select vehicle by your VIN (Vehicle Identification Number).
4 Shift Cables found
Honda Crosstour Shift Cable
In search of affordable OEM Honda Crosstour Shift Cable? Consider browsing through our extensive inventory of genuine Honda Crosstour Shift Cable. Not only do we provide market-leading prices and a manufacturer's warranty, but we also pride ourselves on exceptional customer service and swift delivery.
Honda Crosstour Shift Cable Parts Questions & Experts Answers
- Q: How to remove and install Shift Cable in Automatic transaxle on Honda Crosstour?A: Always disable the airbag system before working near any airbag system component to avoid accidental deployment, which could cause personal injury. Do not use a memory saving device to preserve the PCM's memory when working on or near airbag system components. Begin by removing the center console and positioning the shift lever in Reverse. Remove the locking nut from the pin on the shift lever, then press the holder lock release mechanism and pull the socket holder from the shift lever bracket base. Raise the vehicle and support it securely on jackstands, then remove the exhaust pipe and the heat shield. Working under the vehicle, remove the shift cable guide bracket and grommet from the body, followed by the bolts from the shift cable holder, ensuring to remove the shift cable holder first to prevent damage to the control lever joint. Next, remove the bolts from the shift control cover and separate it from the transaxle. Remove the spring clip and control pin from the control lever for four-cylinder models or the lock bolt for V6 models, then take out the shift cable assembly. For installation, reverse the removal procedure but do not connect the cable to the shift lever bracket or lever inside the vehicle yet. Ensure the shift lever remains in the Reverse position, push the shift cable all the way in until it stops, then back one click into the reverse position. Install a 0.24 inch pin into the positioning hole on the shift lever bracket base and into the alignment hole on the shift lever. Align the socket holder on the shift cable with the slot on the bracket base and slide it into place. Install the shift cable end onto the shift lever pin, ensuring it fits over the square shank, then install and tighten the nut on the shift lever pin. Remove the alignment pin or drill bit, turn the ignition key to On without starting the engine, move the shift lever to each gear position, and verify that the gear position indicator light comes on in each position, ensuring the engine only starts in Park and Neutral. Complete the installation by reversing the removal steps.


